#FOXGM2 - M2M Carrier board for FOX Board G20
@oldproduct
Please evaluate to use the TERRA-M board
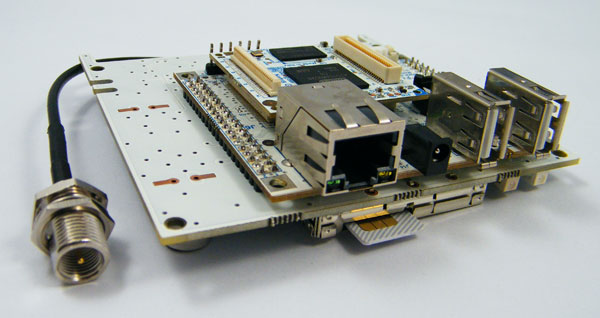
FOXGM2 is a carrier board designed to extend the FOX Board G20 functionality to the M2M applications.
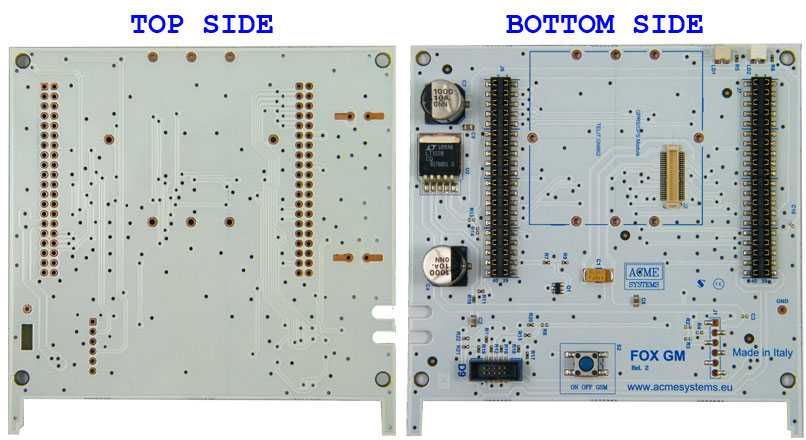 The main differences with the old FOXGM are:
-
The user led L4 and L5 are not available anymore. It is possible to use instead of them a front panel called Daisy-23
(more info...) with a 16x2 alphanumeric LCD and 5 touch
buttons.
-
The Power on and Telit leds are now on the rear side
-
A new Daisy connector called D9 is available to wire a front panel LCD + touch buttons (more info...).
-
The FOX Board G20 connector is now mounted on the bottom side but the FOX is always inserted on the top side.
-
The SIM card now is placed near the rear panel.
-
The P1 connector is no longer available.
 ##Modem power on
At startup the Telit modem is off you can turn on it pressing the pushbutton or via FOX Board using this two lines:
##Modem power on
At startup the Telit modem is off you can turn on it pressing the pushbutton or via FOX Board using this two lines:
-
Telit ON signal on FOX pin J6.37. This pin is used to turn on the modem. The normal state is low.
A 1 second long pulse at 1 will turn-on or turn-off the modem. The state of this signal is inverted compared with the Telit datasheet.
-
Telit RESET signal on FOX pin J6.38. This pin is used to reset the modem logic. The normal state is low. A 1 second long pulse at 1 will reset the modem. The state of this signal is inverted compared with the Telit datasheet.
The following source in Python shows how to turn-on the modem:
@pg='python/sms/teliton.py'
@playground
To user this example you have to install the fox.py module. To do that follow this article that explains
how to install it: @article='playground'.
Run the example by typing:
debarm:~#cd playground
debarm:~/playground# cd python/sms
debarm:~/playground/python/sms# python teliton.py
Telit ON/OFF
The red led LD2 will turn-on immediately and will start to blink. This led is managed directly by the Telit CPU
and indicates its internal state.
To turn off the modem execute the same command.
##Sending AT commands to the modem
When the modem is on you can use AT command to comunicate with it. The serial port used if the /dev/ttyS1.
The easiest way to send command is using the serial terminal emulator minicom.
Run minicom typing:
debarm:/# minicom -s
The option -s is to have access directly to the configuration menu:
            +-----[configuration]------+
            | Filenames and paths      |
            | File transfer protocols  |
            | Serial port setup        |
            | Modem and dialing        |
            | Screen and keyboard      |
            | Save setup as dfl        |
            | Save setup as..          |
            | Exit                     |
            | Exit from Minicom        |
            +--------------------------+
Select Serial port setup then type A and insert the serial device /dev/ttyS1:
    +-----------------------------------------------------------------------+
    | A -    Serial Device      : /dev/ttyS1                                |
    | B - Lockfile Location     : /var/lock                                 |
    | C -   Callin Program      :                                           |
    | D -  Callout Program      :                                           |
    | E -    Bps/Par/Bits       : 115200 8N1                                |
    | F - Hardware Flow Control : Yes                                       |
    | G - Software Flow Control : No                                        |
    |                                                                       |
    |    Change which setting?                                              |
    +-----------------------------------------------------------------------+
            | Screen and keyboard      |
            | Save setup as dfl        |
            | Save setup as..          |
            | Exit                     |
            | Exit from Minicom        |
            +--------------------------+
Save the configuration using Save setup as dfl. Then select Exit.
Now type:
at
OK
to see the OK answer from the modem.
Now refer to the Telit Modules Software User Guide PDF document available here to discover the huge set of AT commands available on this modem.
##Read GPS data from the NMEA ports
On the telit GM862-GPS is available a serial port reserved for the GPS data in NMEA format.
This port is wired on /dev/ttyS3 serial port. To take a look to this data open a new terminal
session with the FOX board. Run minicom -s and set the serial porto to /dev/ttyS3,
No Hardware Flow Control and 4800 baud rate:
    +-----------------------------------------------------------------------+
    | A -    Serial Device      : /dev/ttyS3                                |
    | B - Lockfile Location     : /var/lock                                 |
    | C -   Callin Program      :                                           |
    | D -  Callout Program      :                                           |
    | E -    Bps/Par/Bits       : 4800 8N1                                  |
    | F - Hardware Flow Control : No                                        |
    | G - Software Flow Control : No                                        |
    |                                                                       |
    |    Change which setting?                                              |
    +-----------------------------------------------------------------------+
            | Screen and keyboard      |
            | Save setup as dfl        |
            | Save setup as..          |
            | Exit                     |
            | Exit from Minicom        |
            +--------------------------+
Exit and see the NMEA data flow on your terminal:
$GPGSV,3,3,12,16,00,000,,28,00,000,,26,00,000,,29,00,000,*78
$GPRMC,001441.034,V,,,,,,,291006,,,N*46
$GPGGA,001442.040,,,,,0,00,,,M,0.0,M,,0000*51
$GPGSA,A,1,,,,,,,,,,,,,,,*1E
$GPRMC,001442.040,V,,,,,,,291006,,,N*46
$GPGGA,001443.032,,,,,0,00,,,M,0.0,M,,0000*55
$GPGSA,A,1,,,,,,,,,,,,,,,*1E
$GPRMC,001443.032,V,,,,,,,291006,,,N*42
$GPGGA,001444.031,,,,,0,00,,,M,0.0,M,,0000*51
$GPGSA,A,1,,,,,,,,,,,,,,,*1E
$GPRMC,001444.031,V,,,,,,,291006,,,N*46
$GPGGA,001445.040,,,,,0,00,,,M,0.0,M,,0000*56
$GPGSA,A,1,,,,,,,,,,,,,,,*1E
$GPRMC,001445.040,V,,,,,,,291006,,,N*41
$GPGGA,001446.032,,,,,0,00,,,M,0.0,M,,0000*50
$GPGSA,A,1,,,,,,,,,,,,,,,*1E
$GPGSV,3,1,12,20,00,000,,10,00,000,,31,00,000,,27,00,000,*7C
$GPGSV,3,2,12,19,00,000,,07,00,000,,04,00,000,,24,00,000,*76
$GPGSV,3,3,12,16,00,000,,28,00,000,,26,00,000,,29,00,000,*78
$GPRMC,001446.032,V,,,,,,,291006,,,N*47
$GPGGA,001447.032,,,,,0,00,,,M,0.0,M,,0000*51
$GPGSA,A,1,,,,,,,,,,,,,,,*1E
$GPRMC,001447.032,V,,,,,,,291006,,,N*46
##FOX J6 pins used by the FOXGM2 carrier board
Pin | Signal
-----|------
J6.3 | D9.4
J6.4 | D9.3
J6.5 | D9.2
J6.6 | D9.5
J6.7 | Telit RTS
J6.8 | Telit RXD
J6.9 | Telit TXD
J6.10 | Telit CTS
J6.12 | +5 Vcc
J6.18 | Telit 3.8 volt power supply shutdown
J6.20 | D9.6
J6.28 | Telit PWR CTL
J6.30 | Telit ALARM
J6.31 | D9.8 (I2C SCL)
J6.32 | D9.7 (I2C SDA)
J6.37 | Telit ON/OFF
J6.39 | GND
J6.40 | GND
##FOX J7 pins used by the FOXGM2 carrier board
Pin | Signal
-----|------
J7.1 | GND
J7.2 | GND
J7.13 | Telit AXE
J7.21 | Telit EMMI TX (GPS)
J7.22 | Telit EMMI RX (GPS)
J7.29 | +5VCC
J7.31 | Telit DCD
J7.32 | Telit DSR
J7.33 | Telit RING
J7.34 | Telit DTR
J7.39 | +3.3 Vcc
J7.40 | +3.3 Vcc
##Schematic
* FOXGM2 schematic
##Related links
@shop='FOXGM2'
@shop='GM862-QUAD'
@shop='GM862-GPS'
@shop='COMBO-3'
@shop='COMBO-4'