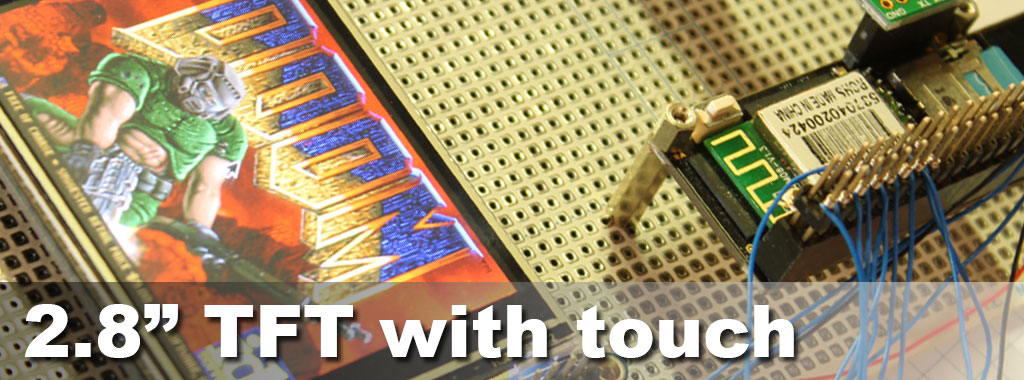
 #Using a 2.8 inch Adafruit (c) TFT display
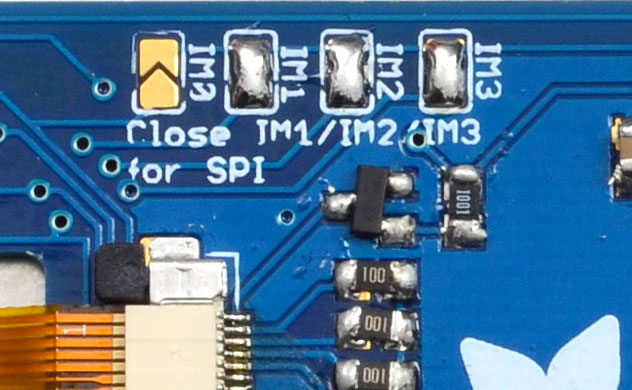
The Adafruit(c) 2.8" TFT display is a bright (4 white-LED backlight) and colorful display with a resolution of 240x320 pixels with individual RGB pixel control, with a 4-wire resistive touchscreen. ##Wirings between Arietta G25 and the Adafruit 2.8 LCD | Adafruit 2.8" LCD pin | Arietta G25 pin | Signal | |-----------------------|-----------------|------------------| | GND | J4.9 | GND | | Vin | J4.1 | 5V | | CLK | J4.7 | SPI1-CLK (PA13) | | MISO | J4.10 | SPI1-MISO (PA11) | | MOSI | J4.8 | SPI1-MOSI (PA12) | | CS | J4.25 | SPI1-CS0 (PA8) | | D/C | J4.31 | PC4 | | RST | J4.33 | PC3 | | Y+ | J4.36 | AD1 | | X+ | J4.38 | AD2 | | Y- | J4.34 | AD0 | | X- | J4.40 | AD3 | It it possible to change the allocation of D/C and RST signals to other GPIO just editing the device tree file As suggested by [Adafruit(c)](https://learn.adafruit.com/adafruit-2-dot-8-color-tft-touchscreen-breakout-v2/spi-wiring) it is requested to close the three pads called IM1, IM2 and IM3 to use this display in SPI mode.
 ##Install the Linux framebuffer drivers for small TFT LCD display modules
It is requested now to compile the __fbtft__ Linux framebuffer drivers for small
TFT LCD display modules available on this [GitHub repository](https://github.com/notro/fbtft).
To do that install the toolchain and the Linux Kernel sources
as exlained on this tutorial @article='compile_linux_3_14' or any other 3.xx Kernel
version.
Then move inside the __drivers/video__ directory:
##Install the Linux framebuffer drivers for small TFT LCD display modules
It is requested now to compile the __fbtft__ Linux framebuffer drivers for small
TFT LCD display modules available on this [GitHub repository](https://github.com/notro/fbtft).
To do that install the toolchain and the Linux Kernel sources
as exlained on this tutorial @article='compile_linux_3_14' or any other 3.xx Kernel
version.
Then move inside the __drivers/video__ directory:
cd drivers/videoand clone the __fbtft__ repository.
git clone https://github.com/notro/fbtft.gitAdd to drivers/video/Kconfig this line:
source "drivers/video/fbtft/Kconfig"Add to drivers/video/Makefile this line:
obj-y += fbtft/Launch the make menuconfig and enable the drivers just installed:
make ARCH=arm menuconfigTo enable the frame buffer and the LCD driver:
---> Device Drivers
	---> Graphics support
		< M > Support for frame buffer devices  --->
		< M > Support for small TFT LCD display modules  --->
			< M > FB driver for the ILI9341 LCD Controller
To enable the touch screen:
---> Device Drivers
	Input device support  --->
		[ * ]   Touchscreens  --->
			< M >   Atmel Touchscreen Interface

---> Device Drivers
	< M > Industrial I/O support  --->
		Analog to digital converters  --->
			< M > Atmel AT91 ADC
Edit __spi__ section of __acme-arietta.dts__ in this way to enable the LCD:
			spi1: spi@f0004000 {
				status = "okay";
				cs-gpios = <&pioA 8 0>;

				device@0 {
					rotate = <270>;
					bgr;
					fps = <30>;
					compatible = "ilitek,ili9341";
					spi-max-frequency = <50000000>;
					reg = <0>;
					regwidth = <8>;
					buswidth = <8>;
					verbose = <3>;
					reset-gpios = <&pioC 3 0>; /* PC3 - J4.33 */
					dc-gpios = <&pioC 4 0>;    /* PC4 - J4.31 */
				};
			};
Set:
* __rotate = <0>;__ Portrait mode with the touch terminal on bottom
* __rotate = <90>;__ Landscape mode with the touch terminal on the left
* __rotate = <180>;__ Portrait mode with the touch terminal on top
* __rotate = <270>;__ Landscape mode with the touch terminal on the right
Note that the wiring between the LCD touchscreen lines and the Arietta
A/D converter line are set for Landscape with touch terminal on right.
Edit __adc__ section of __acme-arietta.dts__ in this way to enable the
touch screen:
			adc0: adc@f804c000 {
				compatible = "atmel,at91sam9x5-adc";
				atmel,adc-clock-rate = <1000000>;
				atmel,adc-ts-wires = <4>;
				atmel,adc-ts-pressure-threshold = <10000>;
				status = "okay";
			};
Copy the new Kernel image and the device tree blob in the first microSD
partition and reboot. After few second the TFT will be initializated
and the console prompt will appear.
##Install X
Install the package:
# apt-get update
# apt-get install xorg
To execute it open a command line session and launch X by typing.
# FRAMEBUFFER=/dev/fb0 startx &Disable the screen saver
# DISPLAY=":0" xset s off##Touch screen calibration Download the __xinput-calibrator__ package from the Debian sid repository because is non available on wheezy.
~# wget http://ftp.lt.debian.org/debian/pool/main/x/xinput-calibrator/xinput-calibrator_0.7.5+git20140201-1_armel.deband install it
~# dpkg -i xinput-calibrator_0.7.5+git20140201-1_armel.debthen run it:
~# DISPLAY=":0" xinput_calibrator --geometry 320x240##Play a video Install Mplayer:
# apt-get update
# apt-get install mplayer
Download this video at 320x240 pixel by typing:
# wget http://terzo.acmesystems.it/download/video/perunpugnodidollari.mp4or from this link: * [Duello da Per un Pugno di Dollari di Sergio Leone](http://terzo.acmesystems.it/download/video/perunpugnodidollari.mp4) Play it by typing:
# DISPLAY=":0" mplayer perunpugnodidollari.mp4This video countains the audio track. To ear it simply use an USB to audio adapter. ##Play with DOOM Install the package:
# apt-get update
# apt-get install chocolate-doom
To execute DOOM launch X.org the type:
# DISPLAY=":0" /usr/games/chocolate-doom -width 320 -height 240It is possible to play using an USB PC Keyboard or using push buttons wired between the Arietta GPIO line and GND. This is an example of bindings to add to the __acme-arietta.dts__ device tree file to manage the DOOM command via external push buttons:
gpio-keys {
	compatible = "gpio-keys";

	esc-key {
		label = "GPIO Key ESC";
		linux,code = <1>;
		gpios = <&pioB 14 0>;
		key-active-low;
		linux,input-type = <1>;
	};

	up-key {
		label = "GPIO Key UP";
		gpios = <&pioA 5 0>;
		linux,code = <103>;
		key-active-low;
		linux,input-type = <1>;
	};

	down-key {
		label = "GPIO Key DOWN";
		gpios = <&pioC 27 0>;
		linux,code = <108>;
		key-active-low;
		linux,input-type = <1>;
	};

	left-key {
		label = "GPIO Key LEFT";
		gpios = <&pioA 7 0>;
		linux,code = <105>;
		key-active-low;
		linux,input-type = <1>;
	};

	right-key {
		label = "GPIO Key RIGHT";
		gpios = <&pioC 31 0>;
		linux,code = <106>;
		key-active-low;
		linux,input-type = <1>;
	};

	ctrl-key {
		label = "GPIO Key LEFTCTRL";
		gpios = <&pioB 12 0>;
		linux,code = <29>;
		key-active-low;
		linux,input-type = <1>;
	};

	enter-key {
		label = "GPIO Key ENTER";
		gpios = <&pioB 13 0>;
		linux,code = <28>;
		key-active-low;
		linux,input-type = <1>;
	};

};
To simulate more keys use the value listed on this file:
* [input.h](https://git.kernel.org/cgit/linux/kernel/git/stable/linux-stable.git/tree/include/uapi/linux/input.h?id=refs/tags/v3.16.1.23)
#Links
* [LCD web page](http://www.adafruit.com/products/1770)
* [LCD Module datasheet](http://www.adafruit.com/datasheets/MI0283QT-11%20V1.1.PDF)
* [IC ILI9341 datasheet](http://www.adafruit.com/datasheets/ILI9341.pdf)
* [fbtft driver sources](https://github.com/notro/fbtft)
* [fbtft driver wiki](https://github.com/notro/fbtft/wiki)
@shop='ARIETTA-G25'
@shop='ARIETTA-G25-256'
@shop='XTERM-01'