#Getting started with CM Home board
This article explains how to get started with the CM Home board
##What do you need to start ?
To start you need at least the following parts:
* A Raspberry Compute Module CM4S:
* a Hi-quality, Hi-speed, Hi-reliability microSD card like the [Industrial SanDisk available on our eshop](/pricelist?category=cmpanel)
* A 12VDC @ 1A or 24VDC @ 0.5A power supply like the [HDR-15-24](/pricelist?category=cmhome)
* An USB to 3.3 volt serial adapter like the [USB-3V-SER](/USB-3V-SER)
* An Ethernet cable wired on a LAN with a DHCP server
## Create a bootlable microSD
Download the Raspberry Pi Imager from this url:
*
then launch it.
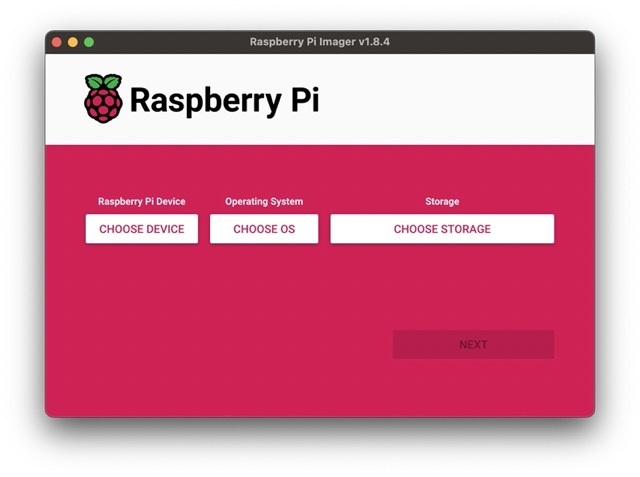 Press the
 CHOOSE DEVICE button and select Raspberry Pi 4
Press the CHOOSE OS button and select the Raspberry Pi OS you like. In this
example we will use Raspberry Pi OS (other) -> Raspberry Pi OS Lite (64-bit)
Insert in your PC the blank microSD and press the CHOOSE STORAGE button and select
the microSD storage.
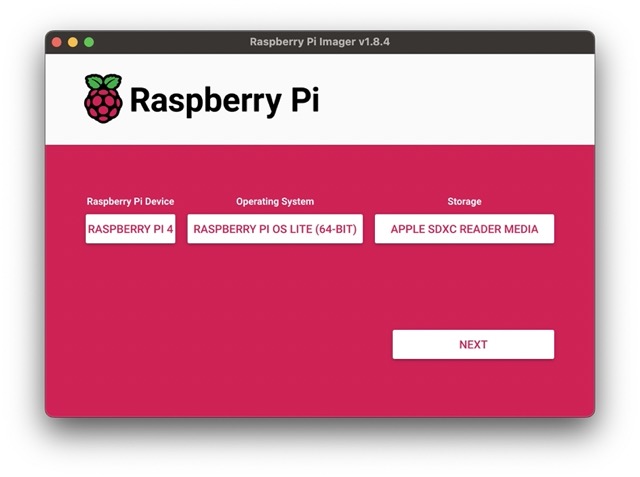 Press the
 NEXT button.
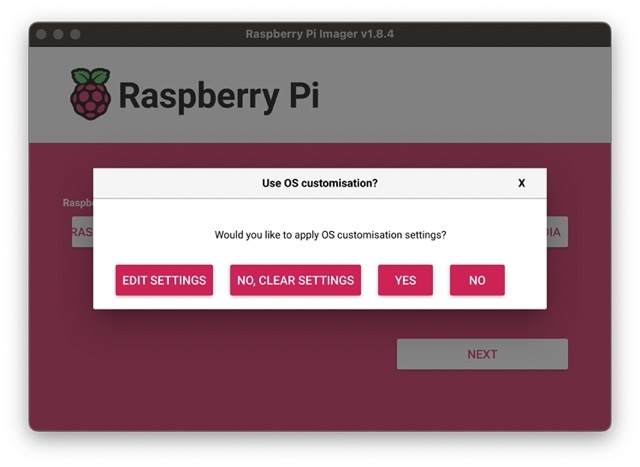 Press the
 EDIT SETTINGS button.
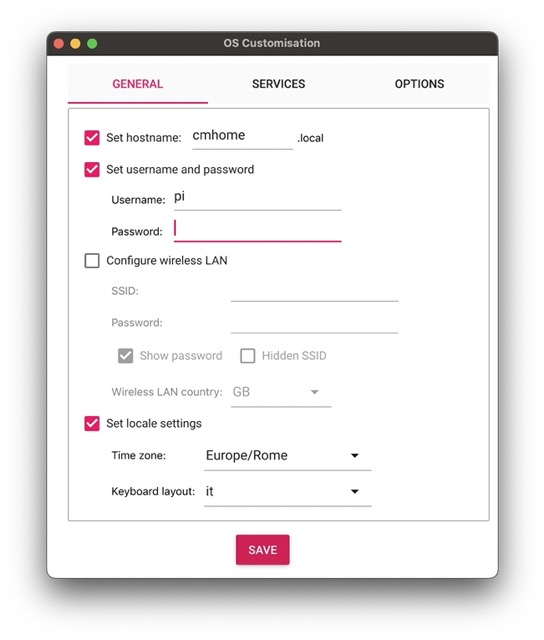 In this form set the hostname of your CM Home, the user and password.
Switch to the tab
In this form set the hostname of your CM Home, the user and password.
Switch to the tab SETTINGS and enable the SSH access.
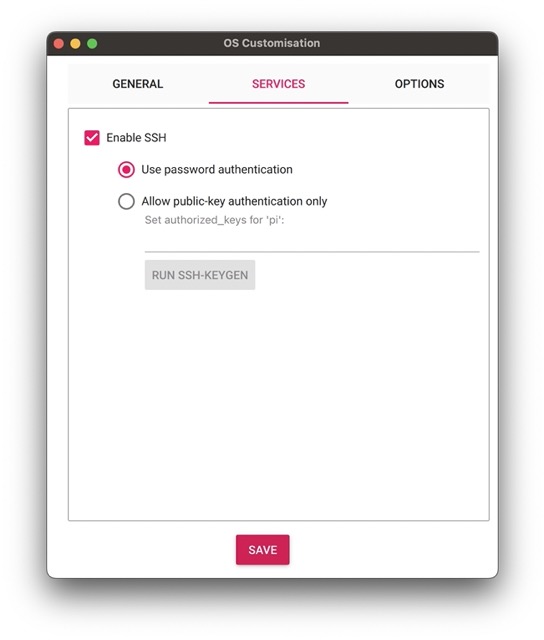 Press the
 SAVE button the the YES button.
The YES again.
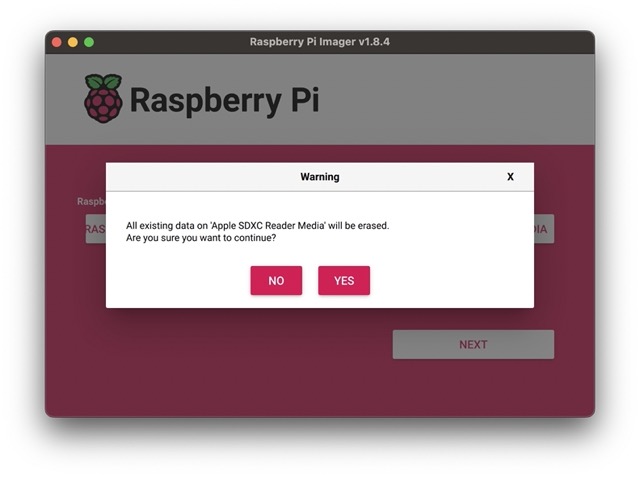 At the end remove the microSD from your PC and insert it again. In this way a partition called
bootfs will be mounted and we can make some changes on it.
Change the content of file config.txt with this:
# For more options and information see
# http://rptl.io/configtxt
# Some settings may impact device functionality. See link above for details
#Ignore the HDMI cable hotplug (to avoid the delay at startup)
hdmi_ignore_hotplug=1
# Set the debug port on GPIO32, GPIO33 pins
force_turbo=1
dtoverlay=uart1,txd1_pin=32,rxd1_pin=33
# Enable the 1-wire bus
dtoverlay=w1-gpio,gpiopin=16
# Set the audio lines on GPIO40 and GPIO41 pins
dtoverlay=pwm,pin=40,func=4
dtoverlay=audremap,pins_40_41
# Enable audio (loads snd_bcm2835)
dtparam=audio=on
audio_pwm_mode=2
# Set the I2C1 on GPIO 44 and GPIO 45 pins
dtoverlay=i2c1,pins_44_45
#Enable the debug message
enable_uart=1
# Automatically load overlays for detected cameras
camera_auto_detect=1
# Automatically load initramfs files, if found
auto_initramfs=1
# Run in 64-bit mode
arm_64bit=1
# Run as fast as firmware / board allows
arm_boost=1
# Enable the LAN9514 chip
dtoverlay=dwc2,dr_mode=host
Edit the file cmdline.txt changing console=serial0,115200 in console=serial1,115200.
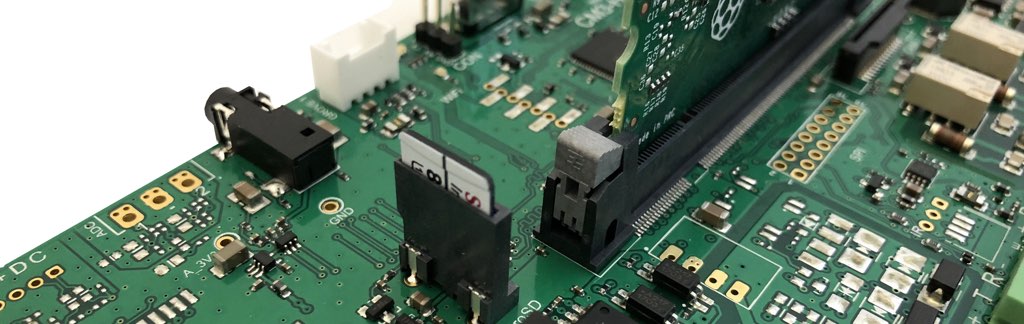
Unmount the microSD card and insert it in its vertical socket
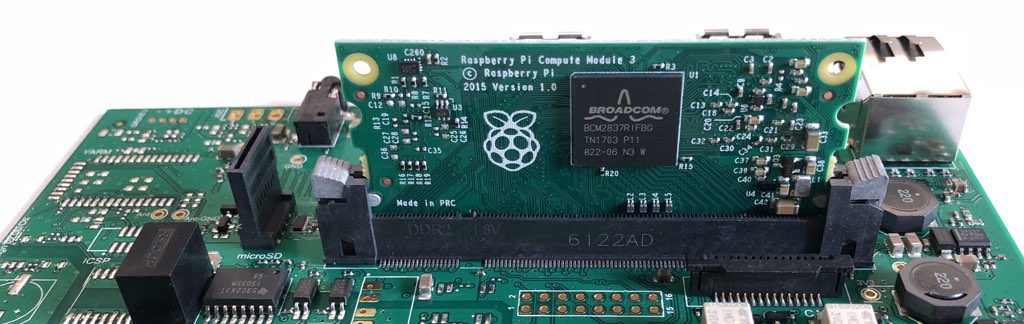
 Insert the Raspberry CM4S on its vertical socket and gently press it until snaps
into the final position as shown below:
Insert the Raspberry CM4S on its vertical socket and gently press it until snaps
into the final position as shown below:
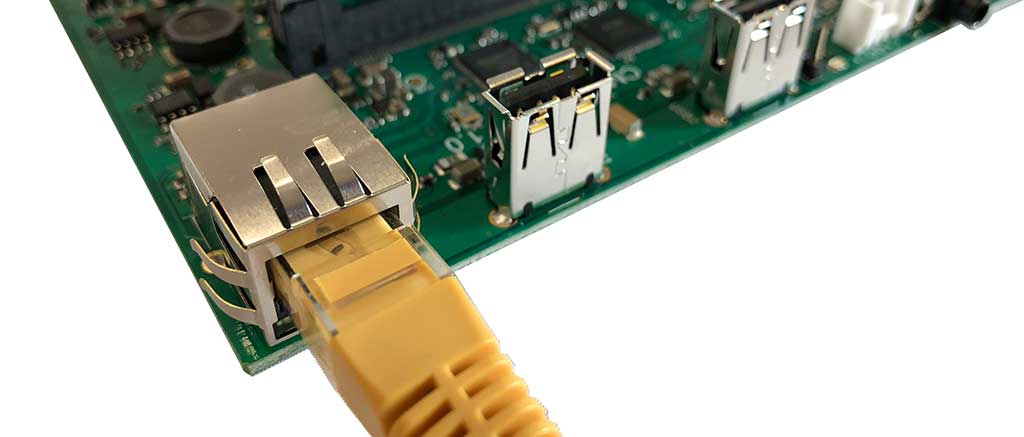
 Plug the Ethernet cable to a LAN with a DHCP server active:
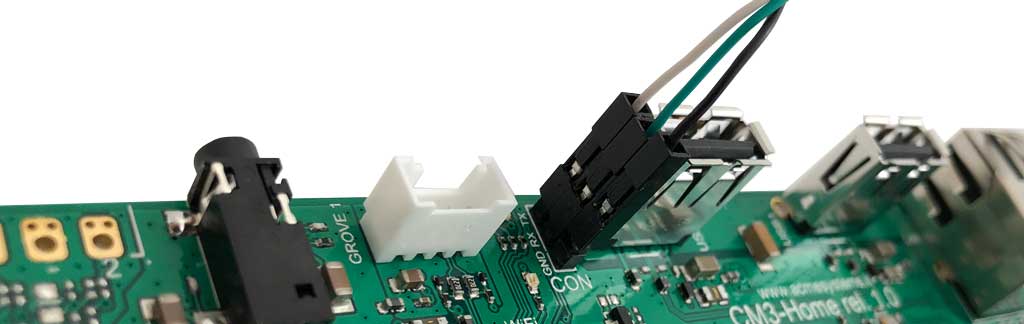
 If you have an USB to serial adapter insert its pins as shown below to
have access to the serial console port.
* @article='USB-3V-SER'
The serial setup is 115200,N,8,1 without
software and hardware handshake.
If you have an USB to serial adapter insert its pins as shown below to
have access to the serial console port.
* @article='USB-3V-SER'
The serial setup is 115200,N,8,1 without
software and hardware handshake.
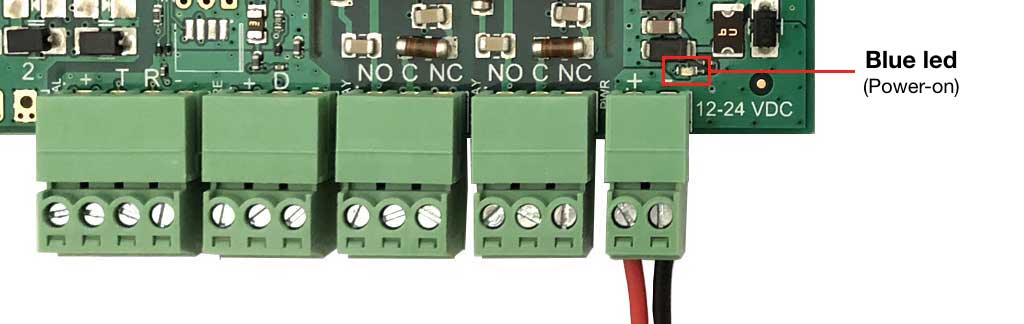
 Connect the power supply lines in a range of 12 to 24 volt DC using the screw terminals as pictured below.
The blue led will turn-on to indicate the power availability:
Connect the power supply lines in a range of 12 to 24 volt DC using the screw terminals as pictured below.
The blue led will turn-on to indicate the power availability:
 On the serial console the boot messages will appear on your serial terminal emulator. If you
are not using a serial terminal check the led on the ethernet connector to see if there is any activities and try
to reach your board from your PC by typing:
ping cmhome.local
Open a SSH session to get the access to the Linux prompt
ssh pi@cmhome.local
Login: pi
Password:
On the serial console the boot messages will appear on your serial terminal emulator. If you
are not using a serial terminal check the led on the ethernet connector to see if there is any activities and try
to reach your board from your PC by typing:
ping cmhome.local
Open a SSH session to get the access to the Linux prompt
ssh pi@cmhome.local
Login: pi
Password:
@include='adv_cmpanel'