# OpenOCD and STLINK for H10 based devices
This article illustrates how to program H10 based devices with OpenOCD and a STLINK-V2 device on a Linux PC.
 ## STLINK Devices
In this article two devices have been tested :
* STM STLINK - V2
* STLINK - V2 Dongle
## STM STLINK - V2
## STLINK Devices
In this article two devices have been tested :
* STM STLINK - V2
* STLINK - V2 Dongle
## STM STLINK - V2
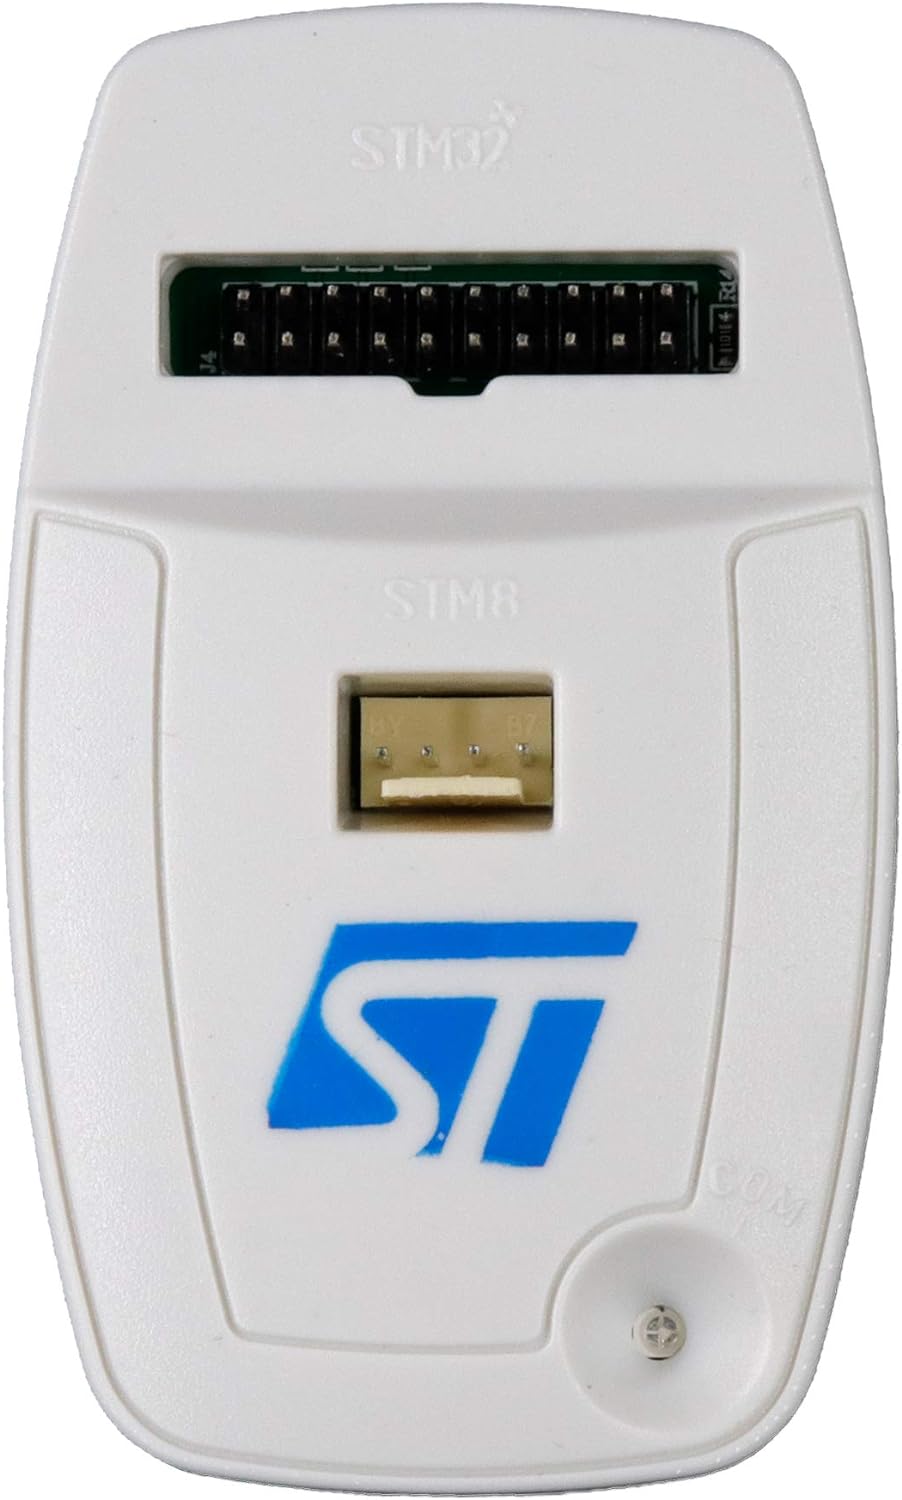 This is the original device developed by STMicrolectronics. It uses a 20 pin connector for both JTAG and SWD.
## STLINK - V2 Dongle
This is the original device developed by STMicrolectronics. It uses a 20 pin connector for both JTAG and SWD.
## STLINK - V2 Dongle
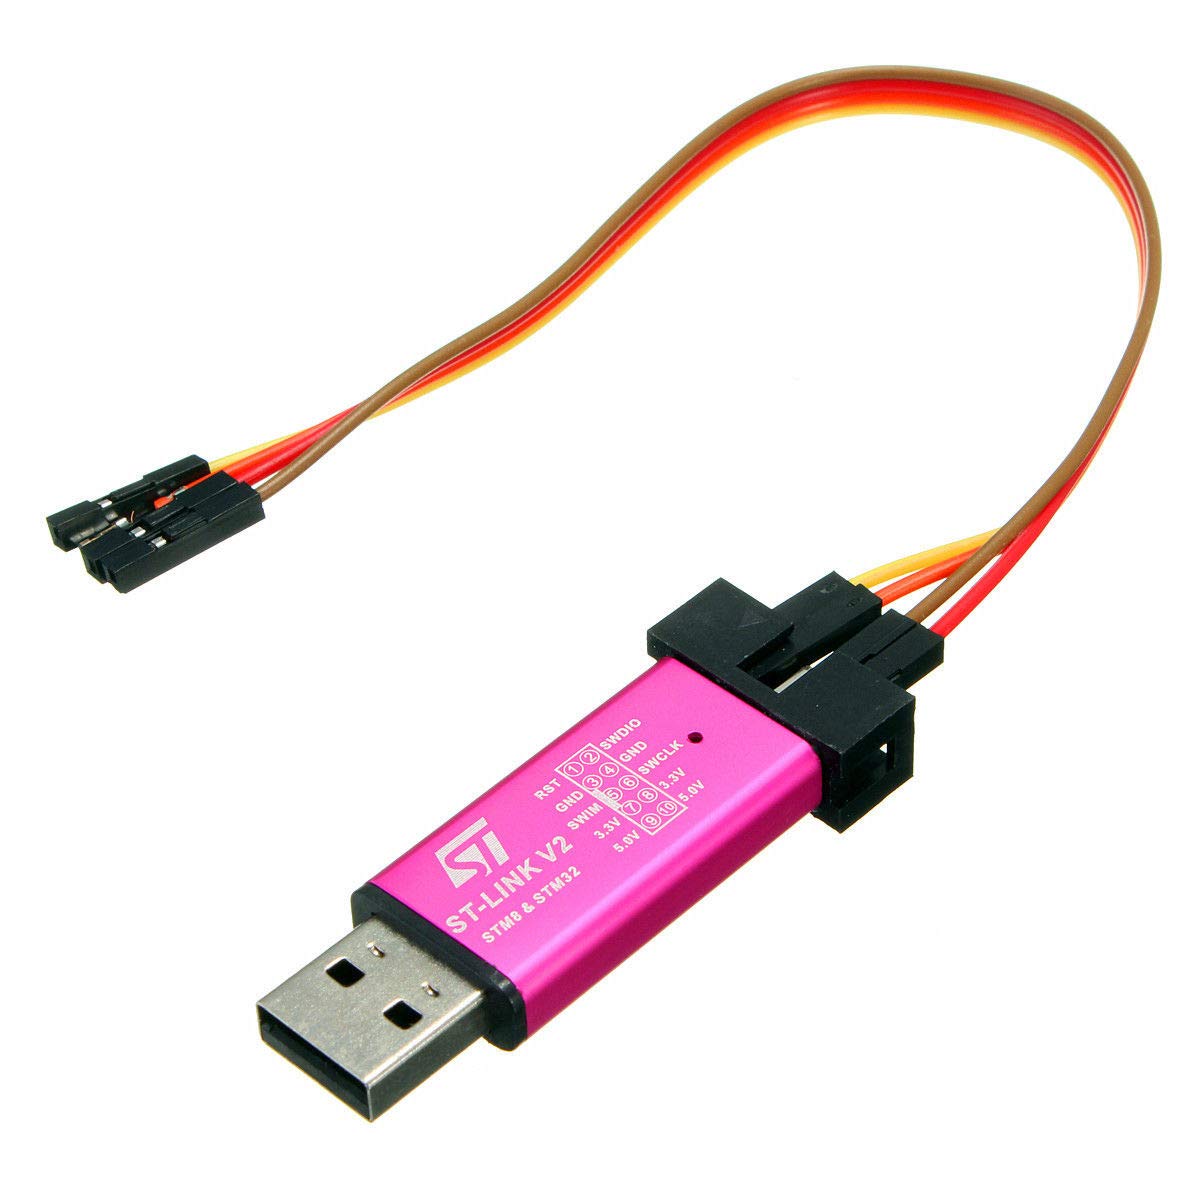 This is a scaled down, non official version, of the original STM device, it has a 10 pin connector and handles SWD only.
## JTAG or SWD ?
We are here only interested in SWD, JTAG is not considered.
## Wirings - For BertaH10
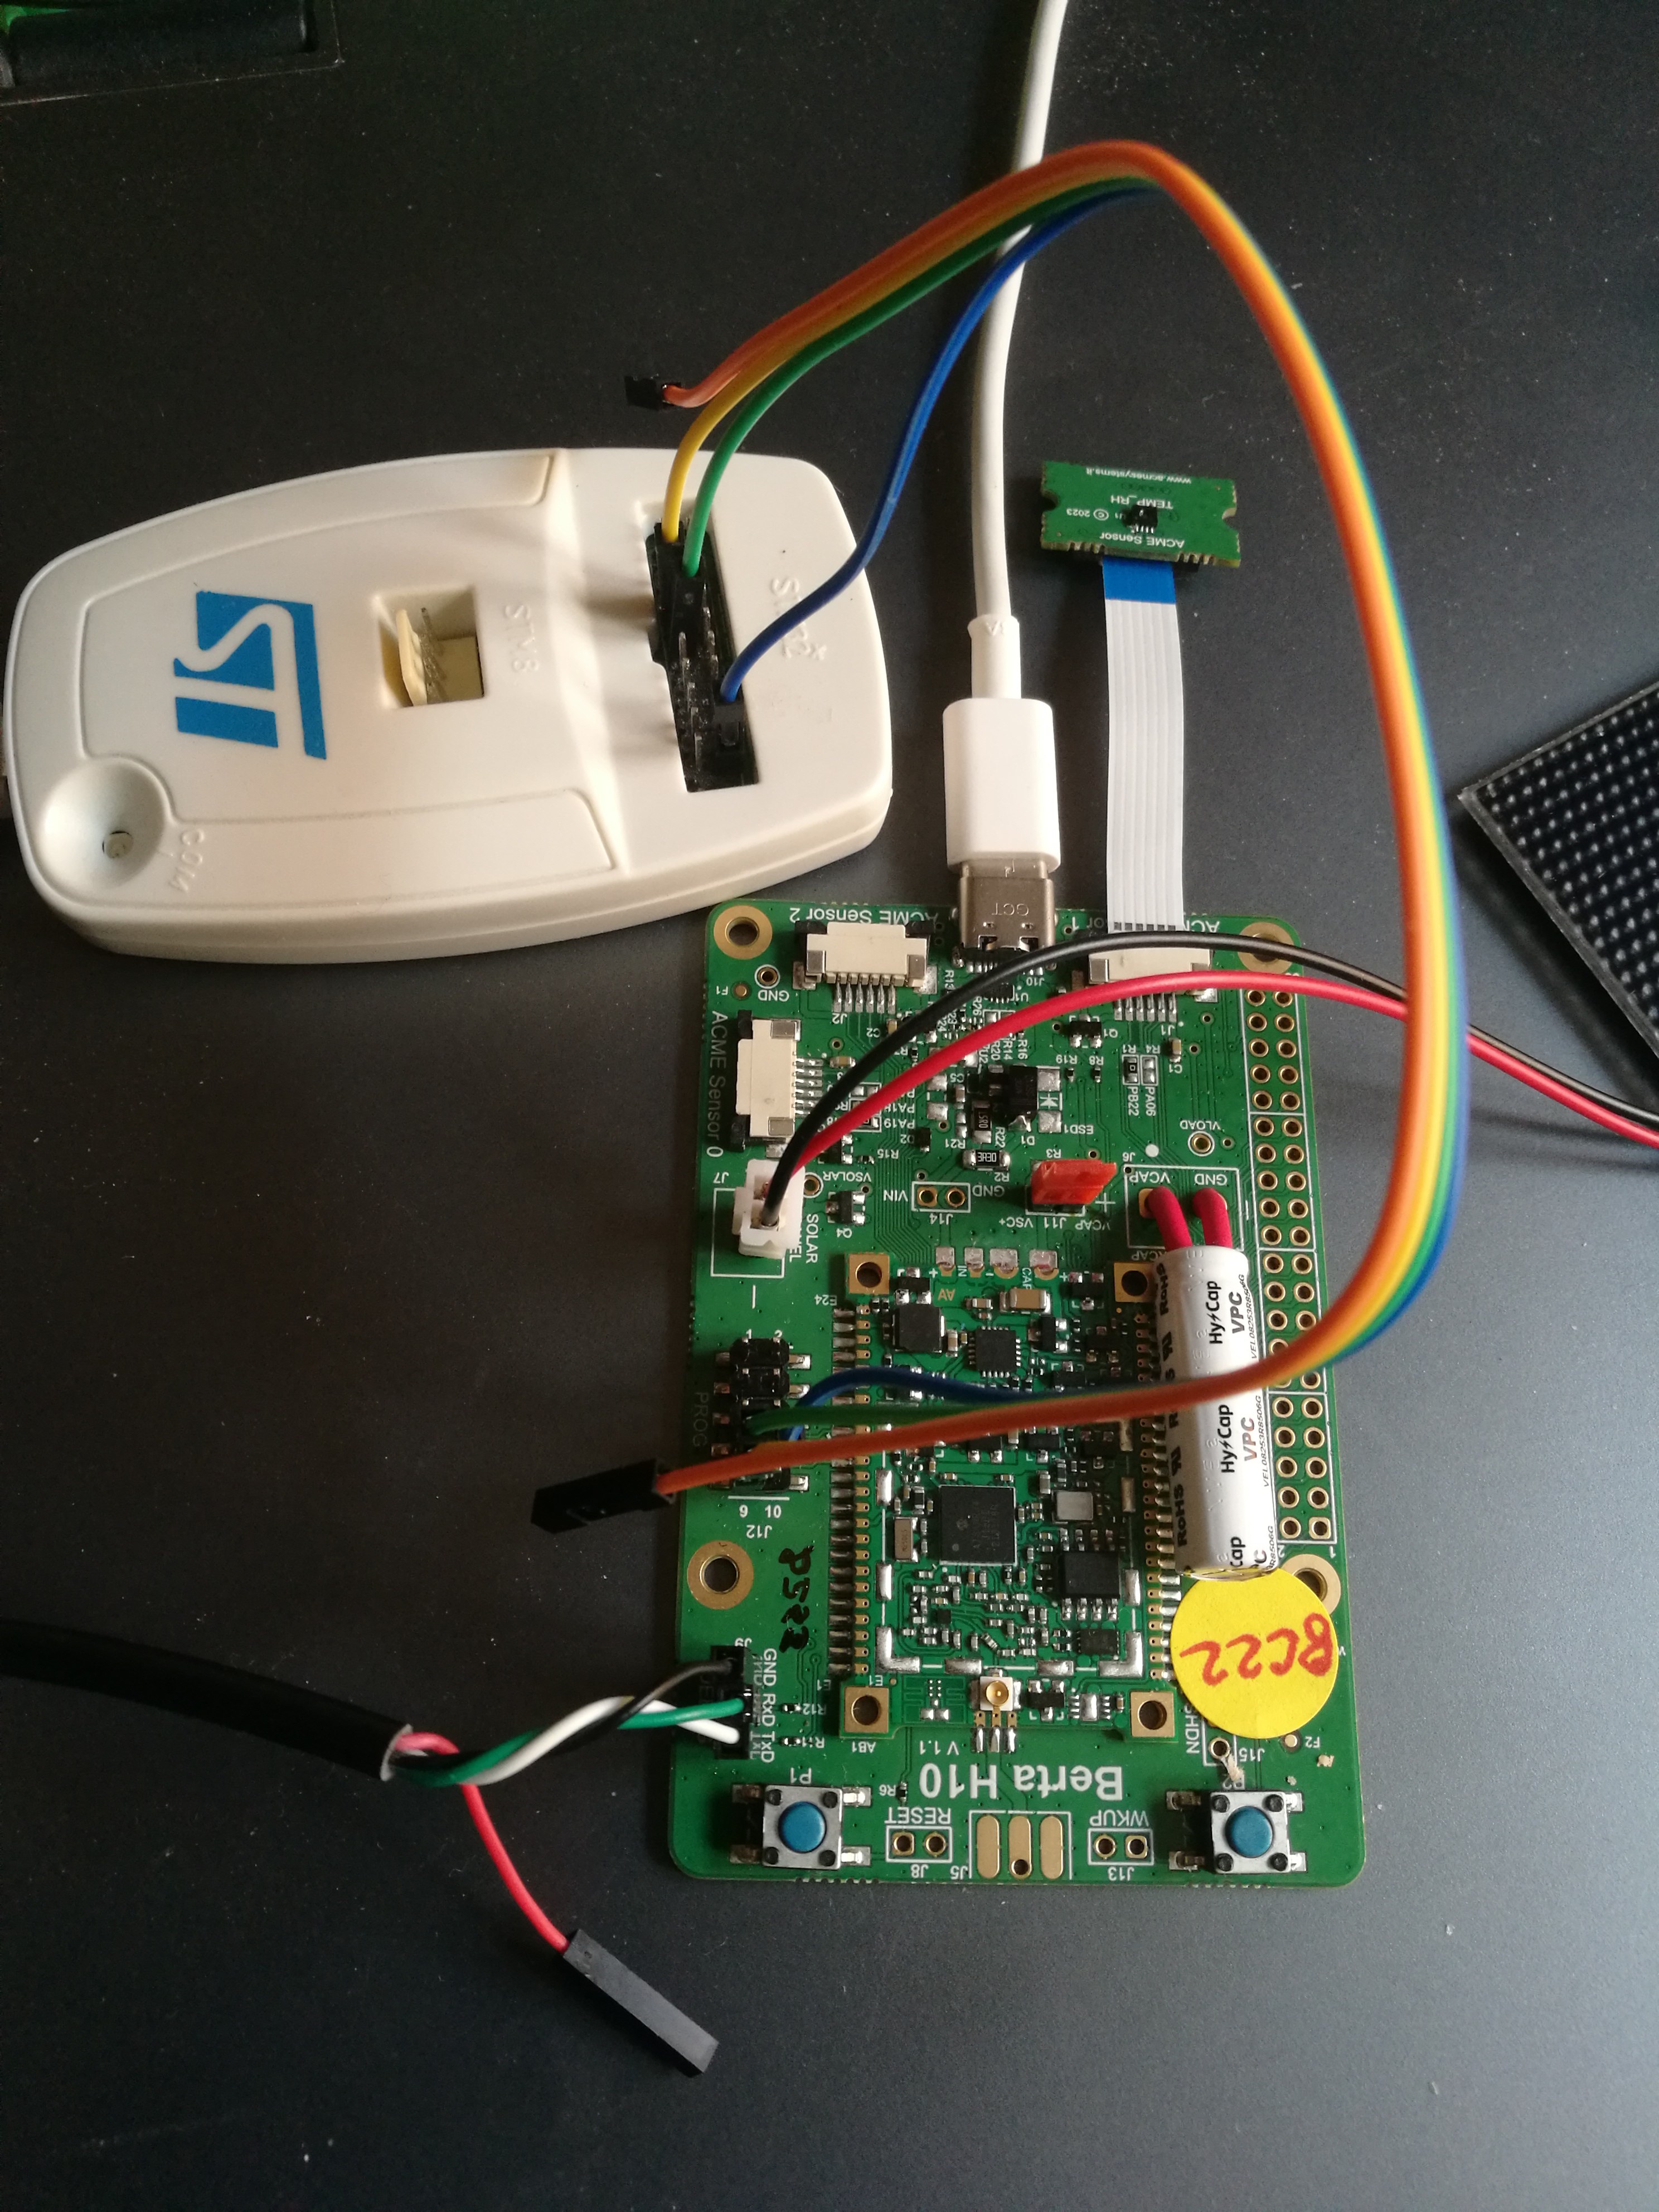
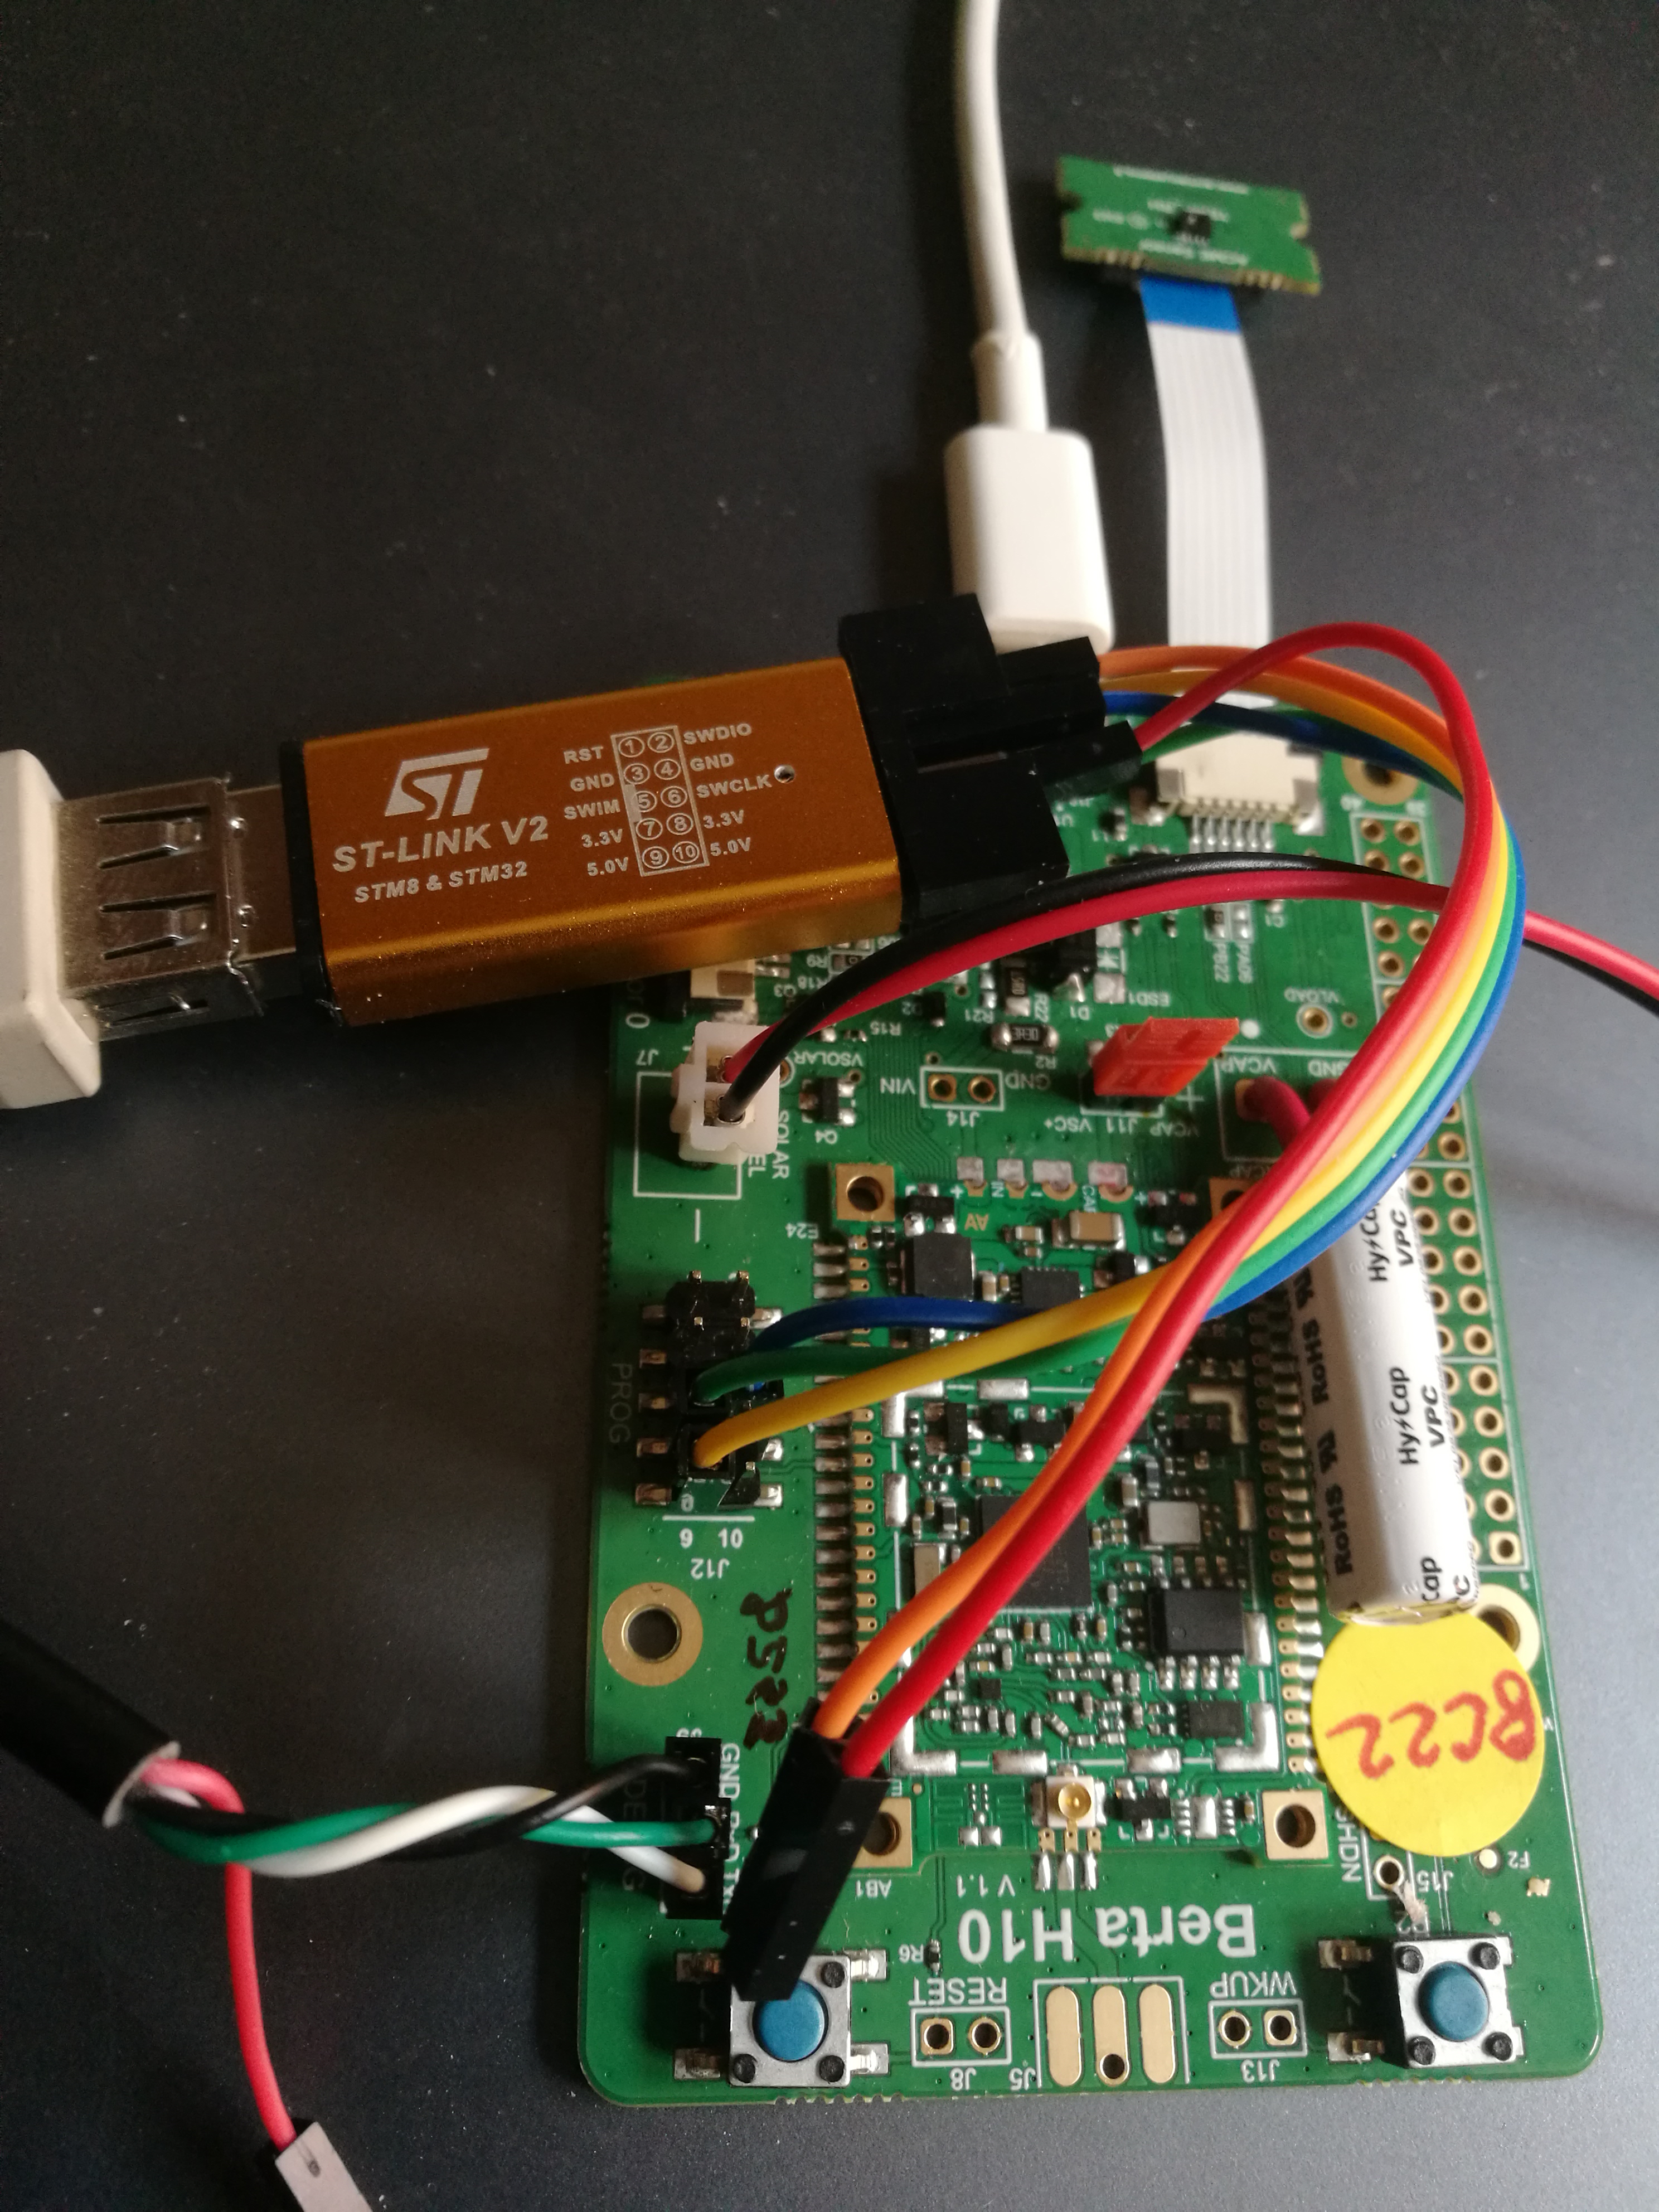
For sake of simplicity, here are shown connections with a BertaH10 board.
| STM STLINK - V2 | STLINK - V2 | Berta J12 pin # | H10 Signals |
|-----------------|-------------|------------------|---------------|
| 9 | 6 | 7 | SWCLK |
| 7 | 2 | 9 | SWDIO |
| 2 | 3 | 8 | GND |
## Install Open OCD
Install on your Linux PC the OpenOCD package
This is a scaled down, non official version, of the original STM device, it has a 10 pin connector and handles SWD only.
## JTAG or SWD ?
We are here only interested in SWD, JTAG is not considered.
## Wirings - For BertaH10
For sake of simplicity, here are shown connections with a BertaH10 board.
| STM STLINK - V2 | STLINK - V2 | Berta J12 pin # | H10 Signals |
|-----------------|-------------|------------------|---------------|
| 9 | 6 | 7 | SWCLK |
| 7 | 2 | 9 | SWDIO |
| 2 | 3 | 8 | GND |
## Install Open OCD
Install on your Linux PC the OpenOCD package
sudo apt update
sudo apt install openocd
Check correct installation and get current version.
openocd -v
Open On-Chip Debugger 0.12.0
## Preparing config file for Openocd
Create and save, in your working directory, a file called openocd.cfg with this content:
source [find interface/stlink.cfg]
set CPUTAPID 0x0bc11477
set CHIPNAME SAMR34J18
source [find target/at91samdXX.cfg]
adapter speed 4000
### Note
Should the following error araise when using for the first time your uC :
Warn : UNEXPECTED idcode: 0xXYZXYZXY
Error: expected 1 of 1: 0x0bc11477
in procedure 'program'
** OpenOCD init failed **
shutdown command invoked
Replace in your openocd.cfg file the parameter CPUTAPID from 0x0bc11477 to 0xXYZXYZXY
## Program the H10 device
Launch the following command:
openocd -f openocd.cfg -c "program firmware.bin preverify verify reset exit"
A few words about the previous comand :
* "preverify" option prevents chip programming if the firmware on board of the H10 device matches the one in the firmware.bin file.
* "verify" option checks that the newly flashed firmware on the H10 device matches the one in the source firmware.bin file.
* "reset" restarts the chip.
* "exit" closes openocd.
### Preverify / verify examples
Flash matches binary file, flash programming skipped, uC is reset, openocd is closed.
pre-verifying
Verified OK - No flashing
Resetting Target
shutdown command invoked
Flash does not match binary file, flash is programmed, verified, uC is reset, openocd is closed.
**pre-verifying**
Error: checksum mismatch - attempting binary compare
** Programming Started **
Info : SAMD MCU: SAMR34J18 (256KB Flash, 32KB RAM)
** Programming Finished **
** Verify Started **
** Verified OK **
** Resetting Target **
shutdown command invoked
## Working with STM STLINK - V2
 ## Working with STLINK - V2 Dongle
 ## Links
*
## Useful commands
## Links
*
## Useful commands
openocd -c "adapter driver list"
@include='bio_rinalduzzi'