 [Download Microchip Studio for AVR® and SAM Devices](https://www.microchip.com/en-us/tools-resources/develop/microchip-studio)
Microchip Studio for AVR® and SAM Devices (ex Atmel Studio 7) is an Integrated Development Environment (IDE) used to program the Microchip CPU mounted on the Yarm radio module. To execute it it's requested a modern Windows PC Microchip Studio for AVR® and SAM Devices includes the Atmel Software Framework (ASF), a large library of free source code with about 1,600 project examples.##Step 2: Create you first project
Launch Microchip Studio 7 then select File -> New -> Project. Click on GCC C ASF Board Project and type a name for your new project then press OK.##Step 3: Add the ASF libraries required by your projectAfter a while a form titled "Board Selection" will appear. Select SAML21 from the Device Family drop down menu and ATSAML21E18B from the related device list then press OK.
The new project is created with a minimal set of files.
Click on src folder and then double click on main.c to open the source template generated by Atmel Studio.
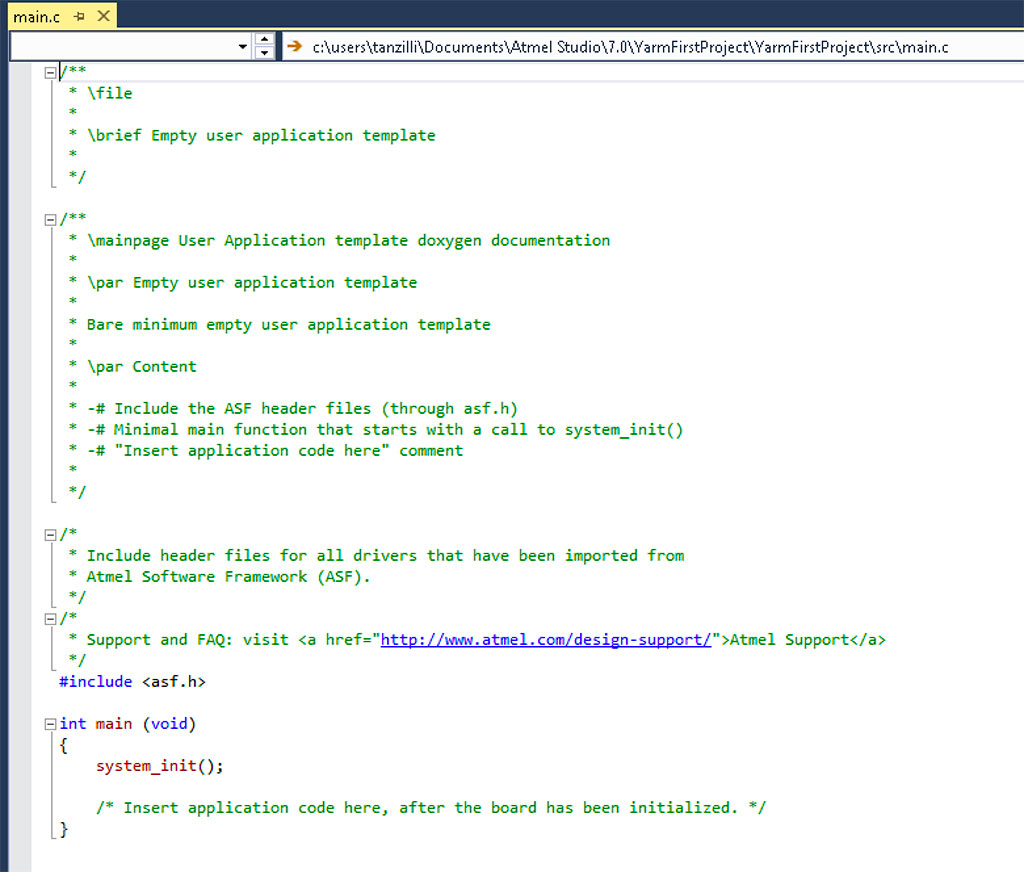
* Read this article: @article='yarm_asf_minimal_set'##Step 4: Write your code
Change the default main.c generated by Atmel with this blinking led code example: @source='main.c' Wire a led to the YARM-DEV board as shown below:##Step 5: Launch the compilation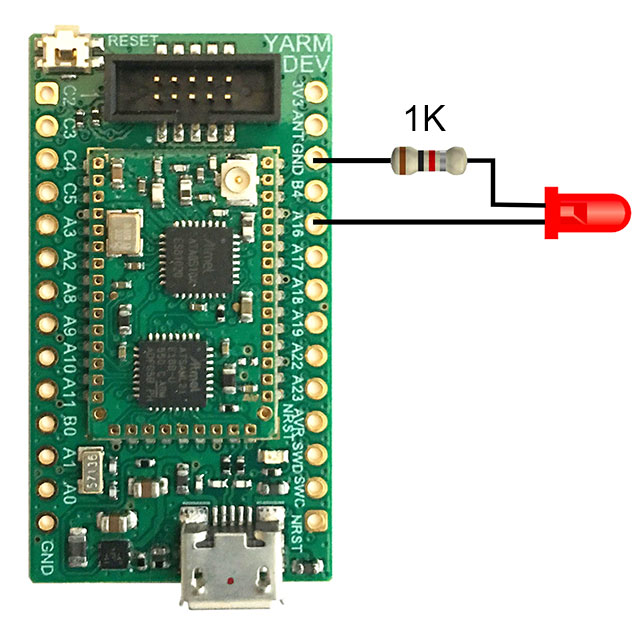
Now launch the C compiler by selecting: Build -> Compile. The output windows will show:##Step 6: Set up the Atmel ICE in-circuit programer/debbuggerBuild started. Project "YarmFirstProject.cproj" (Compile target(s)): Target "Compile" in file "C:\Program Files (x86)\Atmel\Studio\7.0\Vs\Compiler.targets" from project "c:\users\tanzilli\Documents\Atmel Studio\7.0\YarmFirstProject\YarmFirstProject\YarmFirstProject.cproj" (entry point): Task "RunCompilerTask" Shell Utils Path C:\Program Files (x86)\Atmel\Studio\7.0\shellUtils C:\Program Files (x86)\Atmel\Studio\7.0\shellUtils\make.exe "src/main.o" make: 'src/main.o' is up to date. Done executing task "RunCompilerTask". Done building target "Compile" in project "YarmFirstProject.cproj". Done building project "YarmFirstProject.cproj". Build succeeded.
* Plug the ATME-ICE-BASIC programmer on an USB port of your Windows PC and wait until the Atmel driver has been installed correctly. * Select the Atmel Studio menu Tools -> Device Programming * Select the tool Atmel-ICE... and the device ATSAML21E18B then press Apply##Links To know more about the ATA8510 programming read this article: * @article='yarm_avr_programming' More info about Yarm are available on: * @article='doc_yarm' Buy @include='bio_tanzilli'* Connect the YARM-2-ICE adapter and the YARM-DEV board as shown below:
* Move the switch on the YARM-2-ICE adapter on SAM position
* Press the Read button then, if everything goes well, the Device signature will appear. In not be surethat the YARM-DEV boar is plugged to the USB port and to the YARM-2-ICE adapter.

* Press the Close button and select the menu Debug --> Start Without Debugging to launch the program execution.