#BEE Board and Relay

How to manage relay quickly

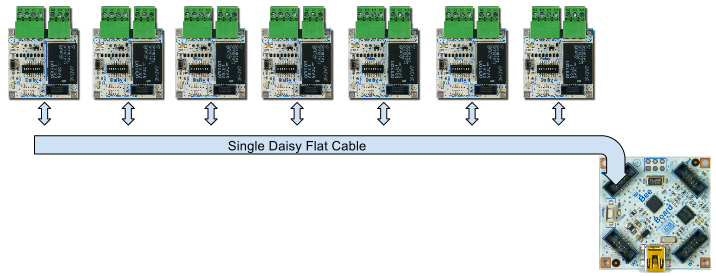
## Multiple relays can be driven simultaneously

<table border="0">
<tr>
<td><img src="./beeboard_8_relay.png"/></td>
<td>
<ul>
<li>DIP8 is not available, it corresponds to 5V pin! (see <a href="http://www.acmesystems.it/beeboard_pinout"> pinout</a> for more info)</li>
<li>Wing W2 only accepts DIP4 to DIP7.</li>
<li>Wing W3 only accepts DIP1 to DIP7.</li>
<li>Wing W4 only accepts DIP1 to DIP7. (I2C disabled)</li>
</ul>
<p class="abstract" >A total of 18 relays can be used simultaneously.</p>
</td>
</tr>
</table>

## Library to manage Daisy2 with BEE Board

* Download and Install it by following [this guide](http://www.acmesystems.it/beeboard_add_libraries_to_ide).
* Plug Ribble Cable on Wings W2, W3 or W4.
* Set Daisy4 Dip-Switch ([more info](http://www.acmesystems.it/DAISY-4))
* open IDE and iclude Daisy4 Library.


## Example: One Relay

<span class="github" user="Madefree" project="playground" file="OneRelay/OneRelay.pde">OneRelay.pde
</span>

## Example: Two Relays

<span class="github" user="Madefree" project="playground" file="TwoRelays/TwoRelays.pde">TwoRelays.pde
</span>

## Related links

* [Madefree web site](http://beeboard.madefree.eu/doku.php/fly_on_daisy:daisy4_relay)
* [BEE Board PINOUT](http://www.acmesystems.it/beeboard_pinout)

@shop='BEEBOARD'
@shop='BEEKIT-1'
@shop='DAISY-4'
@shop='FC-19818-10P-FF'
@shop='JJ-02291-10P-F'
@shop='FC-3754-1M'
