How To access FOX VHDL FoxBone registers values from the FOX BOARDThis article explains how to change foxbone register values inside the FOX VHDL board using several methods that operate directly from the FOX Board. We will use the command line tool foxbone and the Klone application example web interface. |
The foxbone tool
This command line tool is one of the possible ways to access the new foxbone device driver (if compiled in the Fox Board image under test). It is a regular userspace application that can be used as a template to realize your 'C' application if you want to use foxbone registers to access the hardware peripherals inside the FOX VHDL Board.The actions
To see which actions you can take using the tool, simply start it from a Fox Board console session with the option -h# foxbone -h
foxbone usage: foxbone command addr data
valid commands:
r = reset (addr = 0 or 1);
o = output (addr = FoxBone address; data = data in output);
f = output (addr = FoxBone address; data = data in output;
count = number of times to write);
i = input (addr = FoxBone address);
a = get the release info
Typical usages:
foxbone r 1 (reset the foxbone)
foxbone o 1000 55AA (out on FoxBone address 0x1000 of the value 0x55AA)
foxbone f 1000 55AA 0A (output repeated 10 times (0x0a) on FoxBone address
0x1000 of the value 0x55AA)
foxbone i 1000 (in from FoxBone address 0x1000)
#
Using the foxbone tool
The use of the tool is straighforward . The frist thing to try is to get the release numbers inside the FOX VHDL FPGA registers 0x0004 to 0x0007 that correspond to the version of the hardware image inside the FPGA.# foxbone a FoxBone release: 0x0070 FoxBone application word1: 0x2323 FoxBone application word2: 0x0001 FoxBone application word3: 0x0001 #
In this case we have the FOX VHDL FPGA programmed with the FoxBone_TimeBase1.stp hardware image as described in the article FOX VHDL Example TimeBase1. You can see at the beginning of the article it is reported the project release values to help to identify the hardware image inside the FPGA after
the programming.
There are other three options available. These are reset, read and write.
In order to reset the FOXBONE execute the following command :
# foxbone r 1If you want to read data from a register (0x1000 for example) you need to run this command :
# foxbone i 1000
FoxBone input from addr 0x1000: 0x3fbf
And finally, if we want to write data (0x55AA) to a register (0x1000) we need to run the following command :
# foxbone o 1000 55AA
FoxBone output data 0x55aa on addr 0x1000
@idea To continuously monitor the status of up to four FoxBone registers from a console session you can find useful this little utility: A FoxBone Register Monitor Utility
As an example of how to build a C application that accesses directly the foxbone registers from Linux userspace, here is the source code of our foxbone.c application utility program.
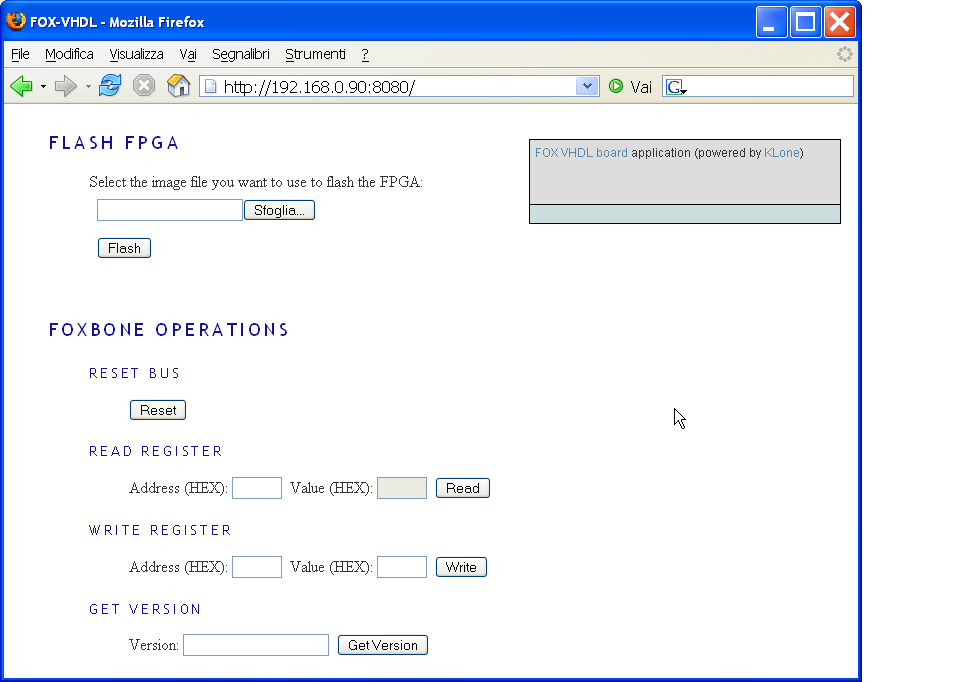
The Klone interface tool
To change the foxbone registers inside the FPGA it is possible also to use an example application powered by Klone that lets change in a very friendly way the foxbone registers.
To access the web services of the Klone application example start your web browser and go to the FOX Board URL:
http://192.168.0.90:8080