MicroSD images download
Terms and conditions for using of binary file
The binary images available on this site are the results of the building procedure described on Acme Systems tutorials for who wants to try them quickly before reading. These images are not the official versions of somewhat and we do not recommend to use them for your final projects because we didn't do any reliability tests on them.
The binaries are provided "as is" without warranty or guarantees of any kind. We not provide any direct support on it but, through these pages and forum posts, we provide all of the information required to obtain the sources and the info to build them from the Open Source software available on Internet.
Please note that all of the software is Open Source so you have to check any license provided by the software authors before using it in any commercial or non-commercial product, by yourself.
Download binary images for Fox Board D27
Buildroot 2023.02.8 Linux - 18-dec-2023
- Kernel Linux 6.1.38
- At91boostrap 4.0.4
- MD5SUM: ba0433145087834bf85808a7e9b43e4f
- Download
Debian Bookworm Linux (03-aug-2023)
- Kernel Linux 6.1.38
- At91boostrap 4.0.4
- MD5SUM: 9ba604eca3682782ee8015a756698994
- Download
How to generate the Buildroot MicroSD
To generate a bootable class='acmetable' microSD from these images use Balena Etcher:
At prompt via debug port interface or via lan using SSH the login data are:
login: root
Password: acmesystems
Only the root is defined
How to generate the Debian MicroSD
To generate a bootable class='acmetable' microSD from these images use Balena Etcher:
At prompt via debug port interface or via lan using SSH the login data are:
foxd27 login: acme
Password: acmesystems
To extend the rootfs partition to fill the whole microSD size type:
sudo ./extend_rootfs.sh
The password for the root user is not defined. To set it log in as acme user and type:
sudo passwd
Download binary images for CM Panel
Raspberry Pi OS with desktop for CM4S module:
- Release date: July 4th 2024
- System: 64-bit
- Kernel version: 6.6
- Debian version: 12 (bookworm)
- MD5SUM: 8811d0e689a80be70a220840fbceef61
Link to download the image:
How to do
Download Raspberry Pi image from this link:
Launch it and select the button:
Select: "Use custom" and write.
Note
This image is like as the original one available on the Raspberry site but with these files changed:
- cmdline.txt
- config.txt
- overlays/goodix-7-acme.dtbo
as explainet in this article:
Download binary images for RoadRunner SOM

Kernel Linux 5.15.68 - Debian Bullseye 11.5 - At91boostrap 4.0.4
Publication date: 30-nov-2022
MD5SUM: 6f30451497fd9230f5263311009805c9
It is possible to generate a bootable class='acmetable' microSD from this image using Balena Etcher on any platform:
At prompt via debug port interface or via lan using SSH the login data are:
roadrunner login: acme
Password: acmesystems
Notes
To extend the rootfs partition to fill the whole microSD size type:
sudo ./extend_rootfs.shThe password for the root user is not defined. To set it log in as acme user and type:
sudo passwdHow to create these binary files from scratch
Kernel Linux 4.19.134 - Debian Buster 10
Version: 26-may-2021
Use balenaEtcher to generate a microSD with this image:
Login data
- Login: acme Password: acmesystems
By default the root password is not defined. To set it login as acme user and type:
sudo passwdTo extend the rootfs to fill the microSD size type:
sudo growpart /dev/mmcblk0 2
sudo resize2fs /dev/mmcblk0p2
Create the binaries from sources
Defconfig and device tree used
Kernel Linux 4.19.78 - Raspbian Buster Lite 2020-02-13
Version: 6-may-2020 Raspberry Pi Raspbian Buster MicroSD for RoadRunner and Raspberry Pi with SSH server enabled.
How-to create a bootable class='acmetable' microSD
- Download the microSD image from this link: https://www.acmesystems.it/download/roadrunner-2020-02-13-raspbian-buster-lite.zip (md5sum: 35ec03863ccf70716c5aff0f615c4825)
- Use Balena Etcher or Raspberry Pi Imager to transfer the image on your MicroSD card
- Boot the MicroSD in a Berta D2 board
Get access in SSH:
ssh pi@roadrunner.localLogin data
- Login: pi Password: raspberry
Kernel Linux 4.9.40 - Debian Jessie 8.9
Version: 07-aug-2017 MicroSD contents for RoadRunner with SSH installed.
Binaries
- First microSD partition files: boot.tar.bz2
- Second microSD partition files: rootfs.tar.bz2
How-to create a bootable class='acmetable' microSD
A Linux Ubuntu PC is required
- Format a microSD with gparted (read more) and mount it
- Download the binaries
- Uncompress the binaries to the microSD with the following commands:
$ tar -xvjpSf boot.tar.bz2 -C /media/$USER/boot
$ sudo tar -xvjpSf rootfs.tar.bz2 -C /media/$USER/rootfs
- unmount the microsd and try it on your board
Login data
- Login: root Password: acmesystems
- Login: acme Password: acmesystems
Create the binaries from sources
Defconfig and device tree used
Download binary images for Acqua

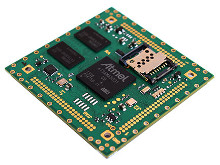
Linux Kernel 5.15.68 - Debian Bullseye 11.5 - At91Bootstrap 4.0.4
Version: 12-oct-2022
Use balenaEtcher to generate a microSD with this image:
Login data
- Login: acme Password: acmesystems
Check the Linux version by typing:
uname -r
5.15.68
Check the Debian version by typing:
cat /etc/debian_version
11.5
By default the root password is not defined. To set it login as acme user and type:
sudo passwd
To extend the rootfs partition to fill the whole microSD space available type:
sudo ./extend_rootfs.sh
Note if you have an Acqua board with 512MB change in the cmdline.txt on the first partition from:
256M
in:
512M
How to create this image from scratch
- Compiling AT91bootstrap 4.0.4
- Compiling Linux Kernel 5.15 LTS
- Build a customized Linux Debian image with Debos
Debian Buster 10.13 - Kernel Linux 5.15.68 - At91Bootstrap 3.9.1
Version: 07-oct-2022
Use balenaEtcher to generate a microSD with this image:
Login data
- Login: acme Password: acmesystems
Check the Linux version by typing:
uname -r
5.15.68
Check the Debian version by typing:
cat /etc/debian_version
10.13
By default the root password is not defined. To set it login as acme user and type:
sudo passwd
To extend the rootfs partition to fill the whole microSD space available type:
sudo growpart /dev/mmcblk0 2
sudo resize2fs /dev/mmcblk0p2
Create the binaries from sources
Defconfig and device tree used
Kernel Linux 4.19.78 - Debian Buster 10.6
Version: 01-dec-2020
Use balenaEtcher to generate a microSD with this image:
Login data
- Login: acme Password: acmesystems
By default the root password is not defined. To set it login as acme user and type:
sudo passwd
To extend the rootfs to fill the microSD size type:
sudo growpart /dev/mmcblk0 2
sudo resize2fs /dev/mmcblk0p2
in case of error use gparted on a Linux PC
If you are using an Acqua board with 512MB of RAM please replace the file boot.bin in the first partition with this file renaming it boot.bin
Create the binaries from sources
Defconfig and device tree used
Kernel Linux 3.10 - Debian Wheezy 7.7 - 12-dec-2014
General purpose image with:
- acme-acqua_lcd_43.dts
- acme-acqua_lcd_50.dts
- acme-acqua_lcd_70.dts
- acme-acqua_no_lcd.dts
- acme-acqua_defconfig
How-to create a bootable class='acmetable' microSD
- Download acqua.img.zip and uncompress its contents
- Write acqua.img on the microSD using:
- On Windows: Win32 Disk Imager
- On Linux: sudo dd if=acqua.img of=/dev/sdX where sdX is the microSD device

- On Mac: sudo dd if=acqua.img of=/dev/diskN where diskN is the microSD device

Login data
- SSH, and Debug port: user root password acmesystems
How-to create these binaries from scratch
Special notes
- For Acqua A5 with 512 MB of RAM rename boot512.bin in boot.bin in the first partition mounted on /boot
- The image contains just the first two partitions (KERNEL and rootfs) and uses just the first 1.8 GB. To add more space create a third partition to add in /etc/fstab or enlarge the rootfs partition size with gparted.
Download binary images for Aria

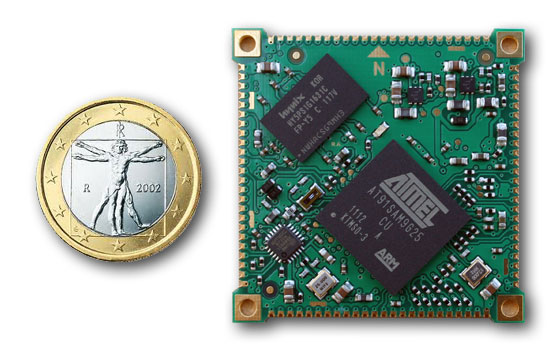
Linux Kernel 5.15.68 - Debian Bullseye 11.5 - At91Bootstrap 3.10.4
Version: 13-oct-2022
Use balenaEtcher to generate a microSD with this image:
Login data
- Login: acme Password: acmesystems
Check the Linux version by typing:
uname -r
5.15.68
Check the Debian version by typing:
cat /etc/debian_version
11.5
By default the root password is not defined. To set it login as acme user and type:
sudo passwd
To extend the rootfs partition to fill the whole microSD space available type:
sudo growpart /dev/mmcblk0 2
sudo resize2fs /dev/mmcblk0p2
Note if you have a board with 256MB change in the cmdline.txt on the first partition from:
128M
in:
256M
Kernel Linux 4.19.128 - Debian Buster 10
Version: 5-oct-2022
Use balenaEtcher to generate a microSD with this image:
Login data
The login data on this image both from debug port or ssh is:
- Login: acme
- Password: acmesystems
Extends the rootfs partition
At the first boot the rootfs size is limited to few megabytes. Check it by typing:
df
Filesystem     1K-blocks   Used Available Use% Mounted on
/dev/root         848684 372712    415644  48% /
devtmpfs          124592      0    124592   0% /dev
tmpfs             125104      0    125104   0% /dev/shm
tmpfs             125104    176    124928   1% /run
tmpfs               5120      0      5120   0% /run/lock
tmpfs             125104      0    125104   0% /sys/fs/cgroup
/dev/mmcblk0p1     97446   4070     93376   5% /boot
In this example I've used an 8GB microSD and the space used is 48%. Type this two commands to use all the microSD space available:
sudo growpart /dev/mmcblk0 2
sudo resize2fs /dev/mmcblk0p2
and check again:
df
Filesystem     1K-blocks   Used Available Use% Mounted on
/dev/root        7531440 433020   6768232   7% /
devtmpfs          124592      0    124592   0% /dev
tmpfs             125104      0    125104   0% /dev/shm
tmpfs             125104    176    124928   1% /run
tmpfs               5120      0      5120   0% /run/lock
tmpfs             125104      0    125104   0% /sys/fs/cgroup
/dev/mmcblk0p1     97446   4070     93376   5% /boot
the space used now is just 7%:
To generate this binaries from sources follow these articles
Kernel configuration and device tree used
Enable the remote SSH access as root
To enable the ssh as root change /etc/ssh/sshd_config using nano
sudo nano /etc/ssh/sshd_config
set this line:
PermitRootLogin yes
and restart sshd by typing:
sudo systemctl restart ssh
Previous images

Aria G25 - Kernel Linux 4.4.9 - Debian Jessie 8.4
MicroSD contents for Aria G25 with: Python, Wi-FiVersion: 08-may-2016
Create a bootable class='acmetable' microSD
A Linux PC is required to follow this procedure:- Format a microSD with gparted following this article
- Mount the two new partitions boot and rootfs just clicking from the file explorer window
- Download the archive with the first microSD partition contents: boot.tar.bz2
- Download the archive with the second microSD partition contents: rootfs.tar.bz2
- Untar the archives to the microSD partitions using the following commands:
- tar -xvjpSf boot.tar.bz2 -C /media/$USER/boot
- sudo tar -xvjpSf rootfs.tar.bz2 -C /media/$USER/rootfs
- The kernel command line parameters are passed by the dts file.
- Unmount the microSD and use it to boot on Aria G25
- Open a SSH session or use the DPI adapter to get the access to the console
- The login data are:
- User: root Password: acmesystems
Read the tutorials page to know how to do create the microSD contents starting from sources.
Defconfig and device tree used
Aria G25

Kernel Linux 4.2.5 - Debian Jessie 8.2
Version: 7-nov-2015MicroSD contents for Aria G25 with the minimal packages to access open a SSH session via LAN.
Binaries
- First microSD partition files: boot.tar.bz2
- Second microSD partition files: rootfs.tar.bz2
How-to create a bootable class='acmetable' microSD
A Linux Ubuntu PC is required
- Format a microSD with gparted (read more) and mount it
- Download the binaries
- Uncompress the binaries to the microSD with the following commands:
$ tar -xvjpSf boot.tar.bz2 -C /media/$USER/boot
$ sudo tar -xvjpSf rootfs.tar.bz2 -C /media/$USER/rootfs
- unmount the microsd and try it on your Aria
Login data
- Login: root Password: acmesystems
Create the binaries from sources
Defconfig and device tree used
Kernel Linux 3.16.1 - Debian Wheezy 3.16.1
Version: 24-nov-2014MicroSD contents for Aria G25 to run Debian Jessie 8.2 and Linux Kernel 4.2.5. It contains the minimal packages to access open a SSH session via LAN.
Versions:
- AT91bootstrap 3.5.3
- Kernel Linux 3.16.1
- Debian 'Wheezy' 7.7
How to generate a bootable class='acmetable' microSD from binaries
- Format a new microSD
- Insert the new microSD in your PC reader and check that the partition kernel and rootfs are mounted
- Download from here these files:
- kernel.tar.bz2
- rootfs.tar.bz2
- Extract the tar file contents inside the first and second microSD partition by typing these commands:
$ sudo tar -xvjpSf kernel.tar.bz2 -C /media/$USER/KERNEL
$ sudo tar -xvjpSf rootfs.tar.bz2 -C /media/$USER/rootfs
- If you have a a Aria G25 with 128 MByte copy boot128.bin on boot.bin.
- Unmount the microSD and use it to boot your Acme Board.
- At login use this account:
login: root
password: acmesystems
How to create the binaries from scratch
The instruction to obtain these executable class='acmetable' files from sources are available on:
Download binary images for Arietta

Linux Kernel 5.15.68 - Debian Bullseye 11.5 - At91Bootstrap 3.10.4
Version: 13-oct-2022
Use balenaEtcher to generate a microSD with this image:
Login data
- Login: acme Password: acmesystems
Check the Linux version by typing:
uname -r
5.15.68
Check the Debian version by typing:
cat /etc/debian_version
11.5
By default the root password is not defined. To set it login as acme user and type:
sudo passwd
To extend the rootfs partition to fill the whole microSD space available type:
sudo ./extend_rootfs.sh
Note if you have a board with 256MB change in the cmdline.txt on the first partition from:
128M
in:
256M

Arietta G25 - Kernel Linux 4.4.79 - Debian Jessie 8.8 - Full
MicroSD contents for Arietta G25 with: Apache, PHP, Python, C, C++, Wi-Fi, Codiad, Ntp.Version: 03-aug-2017
Create a bootable class='acmetable' microSD
A Linux PC is required to follow this procedure:- Format a microSD with gparted following this article
- Mount the two new partitions boot and rootfs just clicking from the file explorer window
- Download the archive with the first microSD partition contents: boot.tar.bz2
- Download the archive with the second microSD partition contents: rootfs.tar.bz2
- Untar the archives to the microSD partitions using the following commands:
- tar -xvjpSf boot.tar.bz2 -C /media/$USER/boot
- sudo tar -xvjpSf rootfs.tar.bz2 -C /media/$USER/rootfs
- Edit the file wpa_supplicant.conf saved on the first microSD partition and insert your WiFi Access Point name and Password
- The command line parameters are not yet passed in this version by at91bootstrap (boot.bin) but is passed by the dts file.
- Unmount the microSD and use it to boot on Arietta G25
- Open a session from a on a PC wired on the same LAN with Bonjour installed.
- web: http://arietta.local
- ssh: root@arietta.local
- The login data are:
- User: acme Password: acmesystems
- User: root Password: acmesystems
Packages installed
- gcc (C compiler)
- g++ (C++ compiler)
- Python
- Apache2
- PHP5
- iw wpasupplicant
- Git
- Bonjour
- Codiad (In browser Ascii editor)
- Minicom (Serial terminal)
- Ntp
Read the tutorials page to know how to do create the microSD contents starting from sources.
Defconfig and device tree used

Arietta G25 - Kernel Linux 4.4.8 - Debian Jessie 8.4 - Full
MicroSD contents for Arietta G25 with: Apache, PHP, Python, C, C++, Wi-Fi, Codiad, Ntp.Version: 27-apr-2016
Create a bootable class='acmetable' microSD
A Linux PC is required to follow this procedure:- Format a microSD with gparted following this article
- Mount the two new partitions boot and rootfs just clicking from the file explorer window
- Download the archive with the first microSD partition contents: boot.tar.bz2
- Download the archive with the second microSD partition contents: rootfs.tar.bz2
- Untar the archives to the microSD partitions using the following commands:
- tar -xvjpSf boot.tar.bz2 -C /media/$USER/boot
- sudo tar -xvjpSf rootfs.tar.bz2 -C /media/$USER/rootfs
- Edit the file wpa_supplicant.conf saved on the first microSD partition and insert your WiFi Access Point name and Password
- The command line parameters are not yet passed in this version by at91bootstrap (boot.bin) but is passed by the dts file.
- Unmount the microSD and use it to boot on Arietta G25
- Open a session from a on a PC wired on the same LAN with Bonjour installed.
- web: http://arietta.local
- ssh: root@arietta.local
- The login data are:
- User: acme Password: acmesystems
- User: root Password: acmesystems
Packages installed
- gcc (C compiler)
- g++ (C++ compiler)
- Python
- Apache2
- PHP5
- iw wpasupplicant
- Git
- Bonjour
- Codiad (In browser Ascii editor)
- Minicom (Serial terminal)
- Ntp
Read the tutorials page to know how to do create the microSD contents starting from sources.
Defconfig and device tree used
Arietta G25 - Kernel Linux 4.4.5 - Buildroot 2016.02 - Minimal
Minimal Linux configuration.Version: 11-mar-2016
Create a bootable class='acmetable' microSD
A Linux PC is required to follow this procedure:- Format a microSD with gparted following this article
- Mount the two new partitions boot and rootfs just clicking from the file explorer window
- Download the archive with the first microSD partition contents: boot.tar.bz2
- Download the archive with the second microSD partition contents: rootfs.tar.bz2
- Untar the archives to the microSD partitions using the following commands:
- tar -xvjpSf boot.tar.bz2 -C /media/$USER/boot
- sudo tar -xvjpSf rootfs.tar.bz2 -C /media/$USER/rootfs
- The command line parameters are not yet passed in this version by at91bootstrap (boot.bin) but is passed by the dts file.
- Unmount the microSD and use it to boot on Arietta G25
- The login data are:
- User: root Password: acmesystems
Read the tutorials page to know how to do create the microSD contents starting from sources.
Defconfig and device tree used
- Device tree: acme-arietta.dts
- Kernel defonfig: kernel_defconfig
- Buildroot defconfig: buildroot_defconfig

Arietta G25 - Kernel Linux 4.2.6 - Debian Jessie 8.2 - Full
MicroSD contents for Arietta G25 with: Apache, PHP, Python, C, C++, Wi-Fi, Codiad, Shell-in-a-box, Ntp.Version: 13-nov-2015
Create a bootable class='acmetable' microSD from tarballs
A Linux PC is required, with a Windows PC use the disk image method.- Download the first microSD partition contents from: boot.tar.bz2 (3.4MB)
- Download the second microSD partition contents from: rootfs.tar.bz2 (182.4MB)
- Format a microSD with gparted (read more) and mount it
- Download the binaries
- Untar the binaries to the microSD with the following commands:
$ tar -xvjpSf boot.tar.bz2 -C /media/$USER/boot
$ sudo tar -xvjpSf rootfs.tar.bz2 -C /media/$USER/rootfs - unmount the microsd and use it to boot on your Arietta
Create a bootable class='acmetable' microSD from disk image
- Download the zipped disk image from arietta.img.zip
- Uncompress its contents to obtain arietta.img file
- Insert a microSD and write arietta.img on it using:
- On Windows: Win32 Disk Imager
- On Linux: sudo dd if=arietta.img of=/dev/sdX where sdX is the microSD device (more info...)
- On Mac: sudo dd if=arietta.img of=/dev/diskN where diskN is the microSD device (more info..)
Notes
- For Arietta G25 with 256 MB of RAM rename boot256.bin in boot.bin in the first partition mounted on /boot
- The image contains just the first two partitions (boot and rootfs) and uses just the first 1.0 GB. To add more space create a third partition to add in /etc/fstab or enlarge the rootfs partition.
Packages installed
- gcc (C compiler)
- g++ (C++ compiler)
- Python
- Apache2
- PHP5
- iw wpasupplicant
- Git
- Bonjour
- Codiad (In browser Ascii editor)
- Shell-in-a-box (In browser ssh client)
- Minicom (Serial terminal)
- Ntp
Read the tutorials page to know how to do create the microSD contents starting from sources.
Login data
Login: root Password: acmesystemsGetting started with this image
- Insert the microSD on your PC (Windows, Linux or Mac)
- Edit the file wpa_supplicant.conf saved on the first microSD partition and insert your WiFi Access Point name and Password
- Boot Arietta with the microSD
- Open a session from a on a PC wired on the same LAN with Bonjour installed.
- web: http://arietta.local
- ssh: root@arietta.local
Defconfig and device tree used
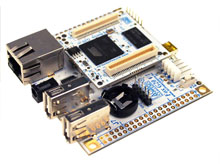
Download binary images for Fox Board G20
 "
"
Kernel Linux 4.19.209 - Debian Buster 10
MicroSD image
To generate the bootable class='acmetable' microSD from this image using Windows, Mac or Linux install Balena Etcher from this link:
Login data
- Login: acme Password: acmesystems
to extend the rootfs to fill the microSD size type:
sudo growpart /dev/mmcblk0 2
sudo resize2fs /dev/mmcblk0p2
Create the binaries from sources
Defconfig and device tree used
Kernel Linux 3.11.6 - EmDebian Wheezy Grip 7.4
Create a bootable class='acmetable' microSD
- Format a new microSD
- Insert the new microSD in your PC reader and check that the partition kernel and rootfs are mounted
- Download from here these files:
- kernel.tar.bz2
- rootfs.tar.bz2
- Extract the tar file contents inside the first and second microSD partition by typing these commands:
$ sudo tar -xvjpSf kernel.tar.bz2 -C /media/$USER/KERNEL
$ sudo tar -xvjpSf rootfs.tar.bz2 -C /media/$USER/rootfs
- Unmount the microSD and use it to boot your Acme Board.
- At login use this account:
login: root
password: netusg20


