Video streaming with an USB Webcam
This article shows how to connect a cheap USB Webcam on the FOX Board LX and see the video stream remotely through a LAN or WiFi link
This examples works with a Labtech Webcam Pro USB, a DLink WiFi adapter with C1 firmware version and the Phrozen SDK updated to the svn version 28 or higher (see Keep the SDK updated).
Quick set upTo try quickly this article flash your FOX Board LX with one of these fimage (How to reflash a FOX Board):
|
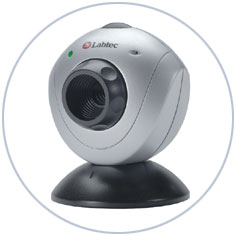
The Labtec Webcam Pro |
Video streaming on WEB
After flashing, plug your webcam and start your browser on http://192.168.0.90:
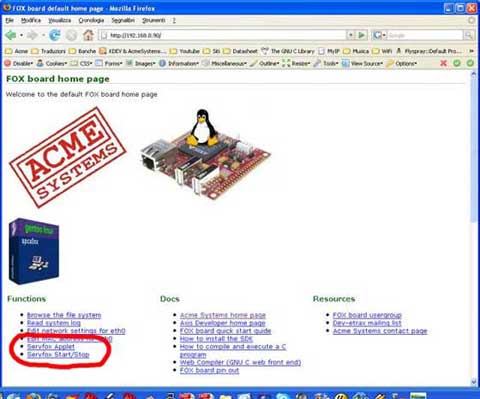
Click on Servfox Start/Stop link and then on the "START" button.
After a while this message appairs:
Starting the server wait
Using /lib/modules/2.6.15/kernel/drivers/media/video/videodev.ko
Using /lib/modules/2.6.15/kernel/drivers/usb/media/spca5xx/spca5xx.ko done!!
Resolution Large
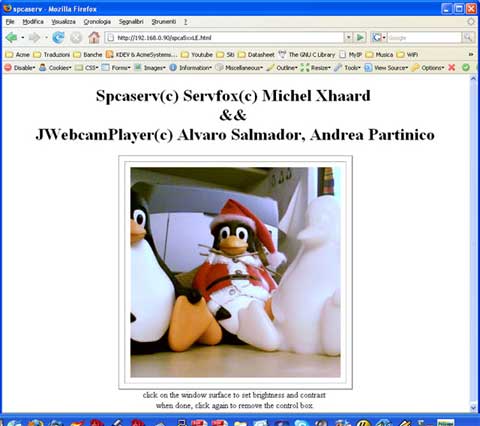
Go back to 192.168.0.90 and click on Servfox Applet link.
A java applet will appair with the live streaming from the webcam:
Video streaming through a native client on Windows XP and Linux
Spcaview is a client video streaming available for Linux and Windows.
For the windows user it is possible to download the source and binary from this link:
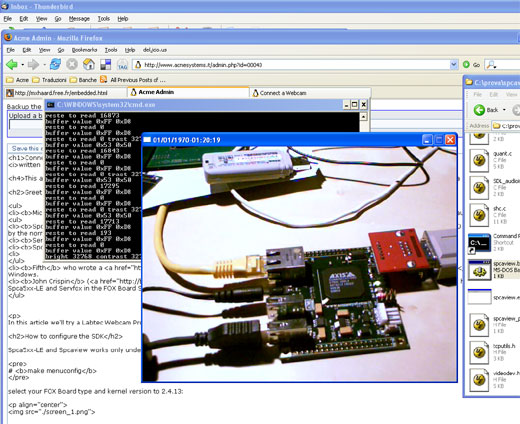
spcaview -w 192.168.0.90:7070 -s 640x480
Double click on it and you will see the streaming from the FOX Board:
Video streaming on WiFi link
Using a D-Link WiFi USB adapter DWL-G122 it is possible to send the video streaming through a WiFi link in Ad-Hoc or Managed mode.
By default, the image generated from Phrozen SDK (or the ready to run fimages downloadable from this article),
are configurated to set up the WiFi adapter in Ad-hoc mode with IP=192.168.10.90, no encryption (WEP="off"), channel=1 and ESSID="FOX".
If you meet any troubles to see the FOX Board LX probably you have to set up the file /etc/conf.d/net.wireless to be visible to
your LAN.
Ad-hoc mode
In Windows XP, if you have a WiFi interface or WiFi USB adapter installed on your PC, you can start to scan the WiFi link available and obtain a list similar to this:
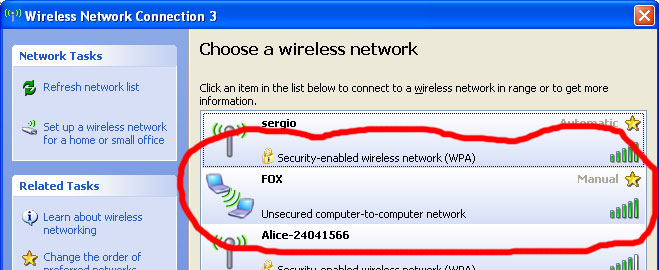
Select the connection and type the Connect button:

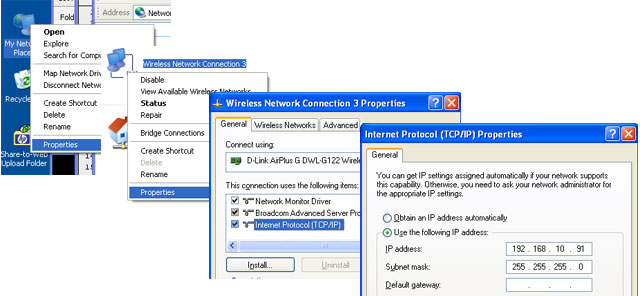
Manually configure the new network wireless connection with IP 192.168.0.91:
Now you can start your browser to have access to the FOX on http://192.168.10.90.
Starts the video server manually
If you need to starts the video driver and video server manually instead of using the web interace follow this istructions.Login to the FOX Board (TELNET access) and type:
[root@axis /root]106# spcaload
Using /lib/modules/2.4.31/kernel/drivers/media/video/videodev.o
Using /lib/modules/2.4.31/kernel/drivers/usb/spca5xx/spca5xx.o
Then type:
[root@axis /root]106# dmesg
...
...
Linux video capture interface: v1.00
usb.c: registered new driver spca5xx
spca_core.c: USB SPCA5XX camera found. Type Labtec Webcam Pro Zc0302 + Hdcs2020
spca_core.c: spca5xx driver 00.57.06LE registered
The green led on your camera now could be on to indicate the camera is ready to operate.
Start the streaming server typing:
[root@axis /root]106# servfox -d /dev/video0 -s 640x480 -w 7070
servfox version: 1.1.3 date: 11:12:2005 (C) mxhaard@magic.fr
wrong spca5xx device
Waiting .... for connection. CTrl_c to stop !!!!
I don't know why appear "wrong spca5xx device" but the FOX is now ready to send a video streaming to one or more client on port 7070.
Phrozen SDK setup
This is the steps to configure the Phrozen SDK (Create a working image using Phrozen SDK)to obtain the fimages used in this article.Update the Phrozen SDK to the svn version 28 or higher (see Keep the SDK updated).
From the SDK root directory type:
# make menuconfig
To enable the Webcam support and Xhaard webcam tools enable from Driver settings ---> menu:
[*] Enable Webcam support
[*]   Webcam tools - Michel Xhaard....
To enable the DLink WiFi driver select the item Driver settings --->, and enable the item:
[*] wireless toolsnow then select DLink DWL-G122 and enable:
(X) C1Exit, save and type:
# ./configure
...
# make
...
After a while you will have your fimage file. Close the boot jumper J8 and type:
# make flash
...
How to reflash a FOX Board
Related link
- Michel Xhaard Servfox/Spca5xx-LE/Spcaview home page
- Ralink Linux support page
Ralink RT2571WF is the chipset used on the DLink wireless adapter. On this site you will find the official Linux driver for this chipset. Only the last release 1.1.0.0 of RT2501USB(RT73:RT2571W/RT2573/RT2671) works well on the FOX Board LX. - Wireless Tools for Linux
- Labtec webcam pro
- D-Link WiFi USB adapter DWL-G122
- Use a DLINK WiFi USB adapter
