Installing and setting up of the Development Environment
To get started with the Bee Board you need to install the standard Arduino Development Environment and then add the Bee Board support on it. This article illustrates how to do it
Installing the Arduino Environment
"The Arduino development environment contains a text editor for writing code, a message area, a text console, a toolbar with buttons for common functions, and a series of menus. It connects to the Arduino hardware to upload programs and communicate with them"
Read the original article on the Arduino web site
Installing the Arduino Environment
Some very clear guides to install the Arduino development environment are available on the Arduino web site for the following operative systems:
Read the guide for your PC and, at the end, add the support to use the BeeBoard instead of Arduino.
Add the Bee Board support to the Arduino Development Environment
To add the Bee Board in the environment board menu:
- Close the Arduino environment.
- Search boards.txt file in the Arduino install directory. (e.g. in osx /Applications/Arduino.app/Contents/Resources/Java/hardware/arduino/)
- Append these lines to boards.txt file:
for Arduino IDE 1.0
Arduino 1.0 is now supported by [Bee Libraries](http://www.acmesystems.it/beeboard_add_libraries_to_ide)
##############################################################

bee328.name=Bee Board with ATmega328
bee328.upload.protocol=arduino
bee328.upload.maximum_size=32256
bee328.upload.speed=115200
bee328.bootloader.low_fuses=0xff
bee328.bootloader.high_fuses=0xde
bee328.bootloader.extended_fuses=0x05
bee328.bootloader.path=optiboot
bee328.bootloader.file=optiboot_atmega328.hex
bee328.bootloader.unlock_bits=0x3F
bee328.bootloader.lock_bits=0x0F
bee328.build.mcu=atmega328p
bee328.build.f_cpu=16000000L
bee328.build.core=arduino
bee328.build.variant=standard
for Arduino IDE 23 or earlier releases.
##############################################################

bee328.name=Bee Board with ATmega328
bee328.upload.protocol=stk500
bee328.upload.maximum_size=32256
bee328.upload.speed=115200
bee328.bootloader.low_fuses=0xff
bee328.bootloader.high_fuses=0xde
bee328.bootloader.extended_fuses=0x05
bee328.bootloader.path=optiboot
bee328.bootloader.file=optiboot_atmega328.hex
bee328.bootloader.unlock_bits=0x3F
bee328.bootloader.lock_bits=0x0F
bee328.build.mcu=atmega328p
bee328.build.f_cpu=16000000L
bee328.build.core=arduino
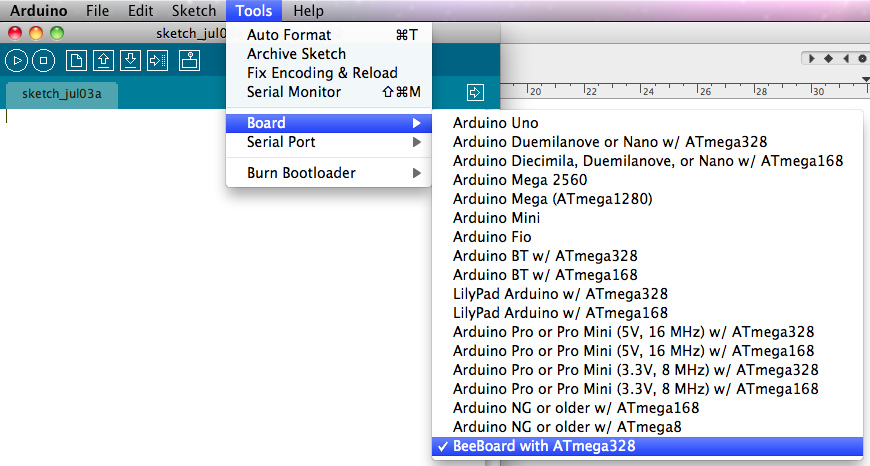
- Open the Arduino environment and select Bee Board from the Tools > Board menu.
Now you are ready to try the code examples on your Bee Board
Related links
